Connect PrestaShop to RUIT
Connect PrestaShop to RUIT: enable the web service, create a key with the permissions RUIT uses and paste it in along with your store's address.
In this tutorial you connect your PrestaShop store to RUIT. PrestaShop connects with a key for its web service, which you create in your own store’s admin panel and give permissions resource by resource. There are two parts: preparing the key in PrestaShop and pasting it into RUIT. It takes ten minutes and you only do it once.
You need administrator access to the PrestaShop admin panel, the store served over https://
and a verified phone, because without it the connection wizard does
not open.
1. Enable the PrestaShop web service
In your store’s admin panel, go to Advanced Parameters → Webservice. It comes switched off by default: set Enable PrestaShop’s webservice to Yes and press Save.
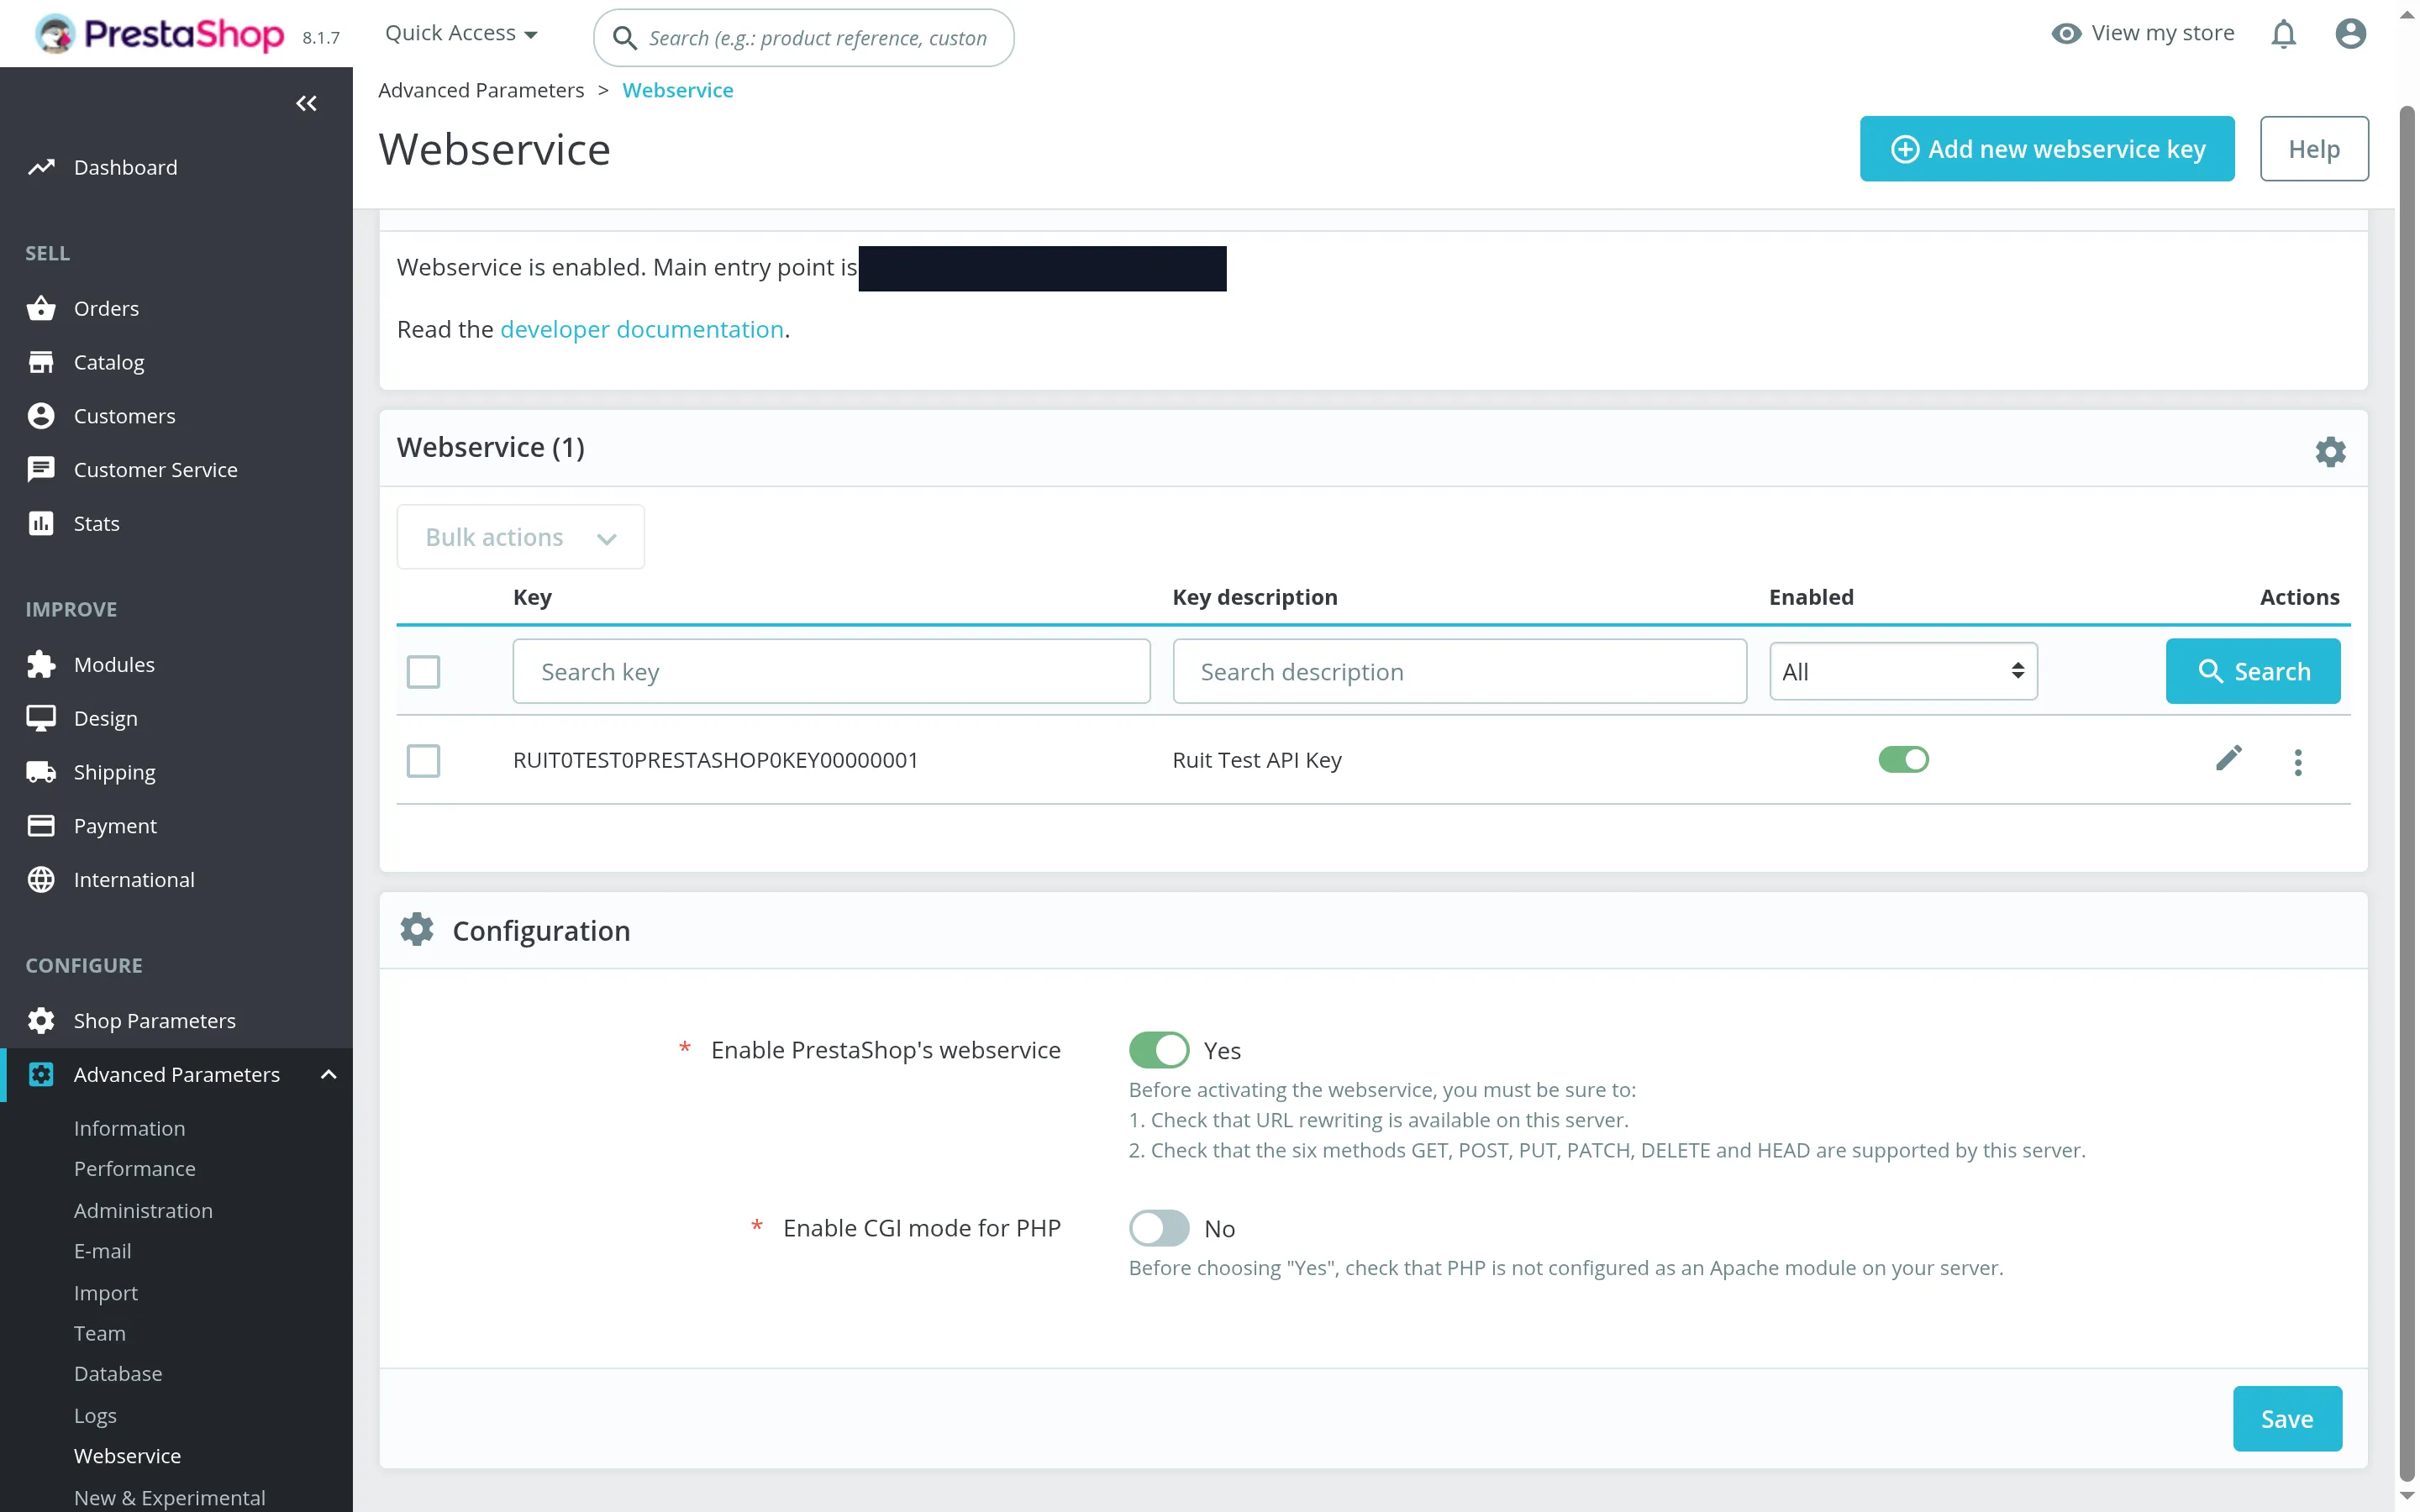
The web service page, with the admin panel in English. The boxes mark the enable switch and the button for adding a new key.
2. Create a key for RUIT
On the same screen, press Add new webservice key. Press Generate so that PrestaShop makes up the key, give it a description you will recognize and leave it enabled. Copy the key: it is the one you will paste into RUIT in step 4.
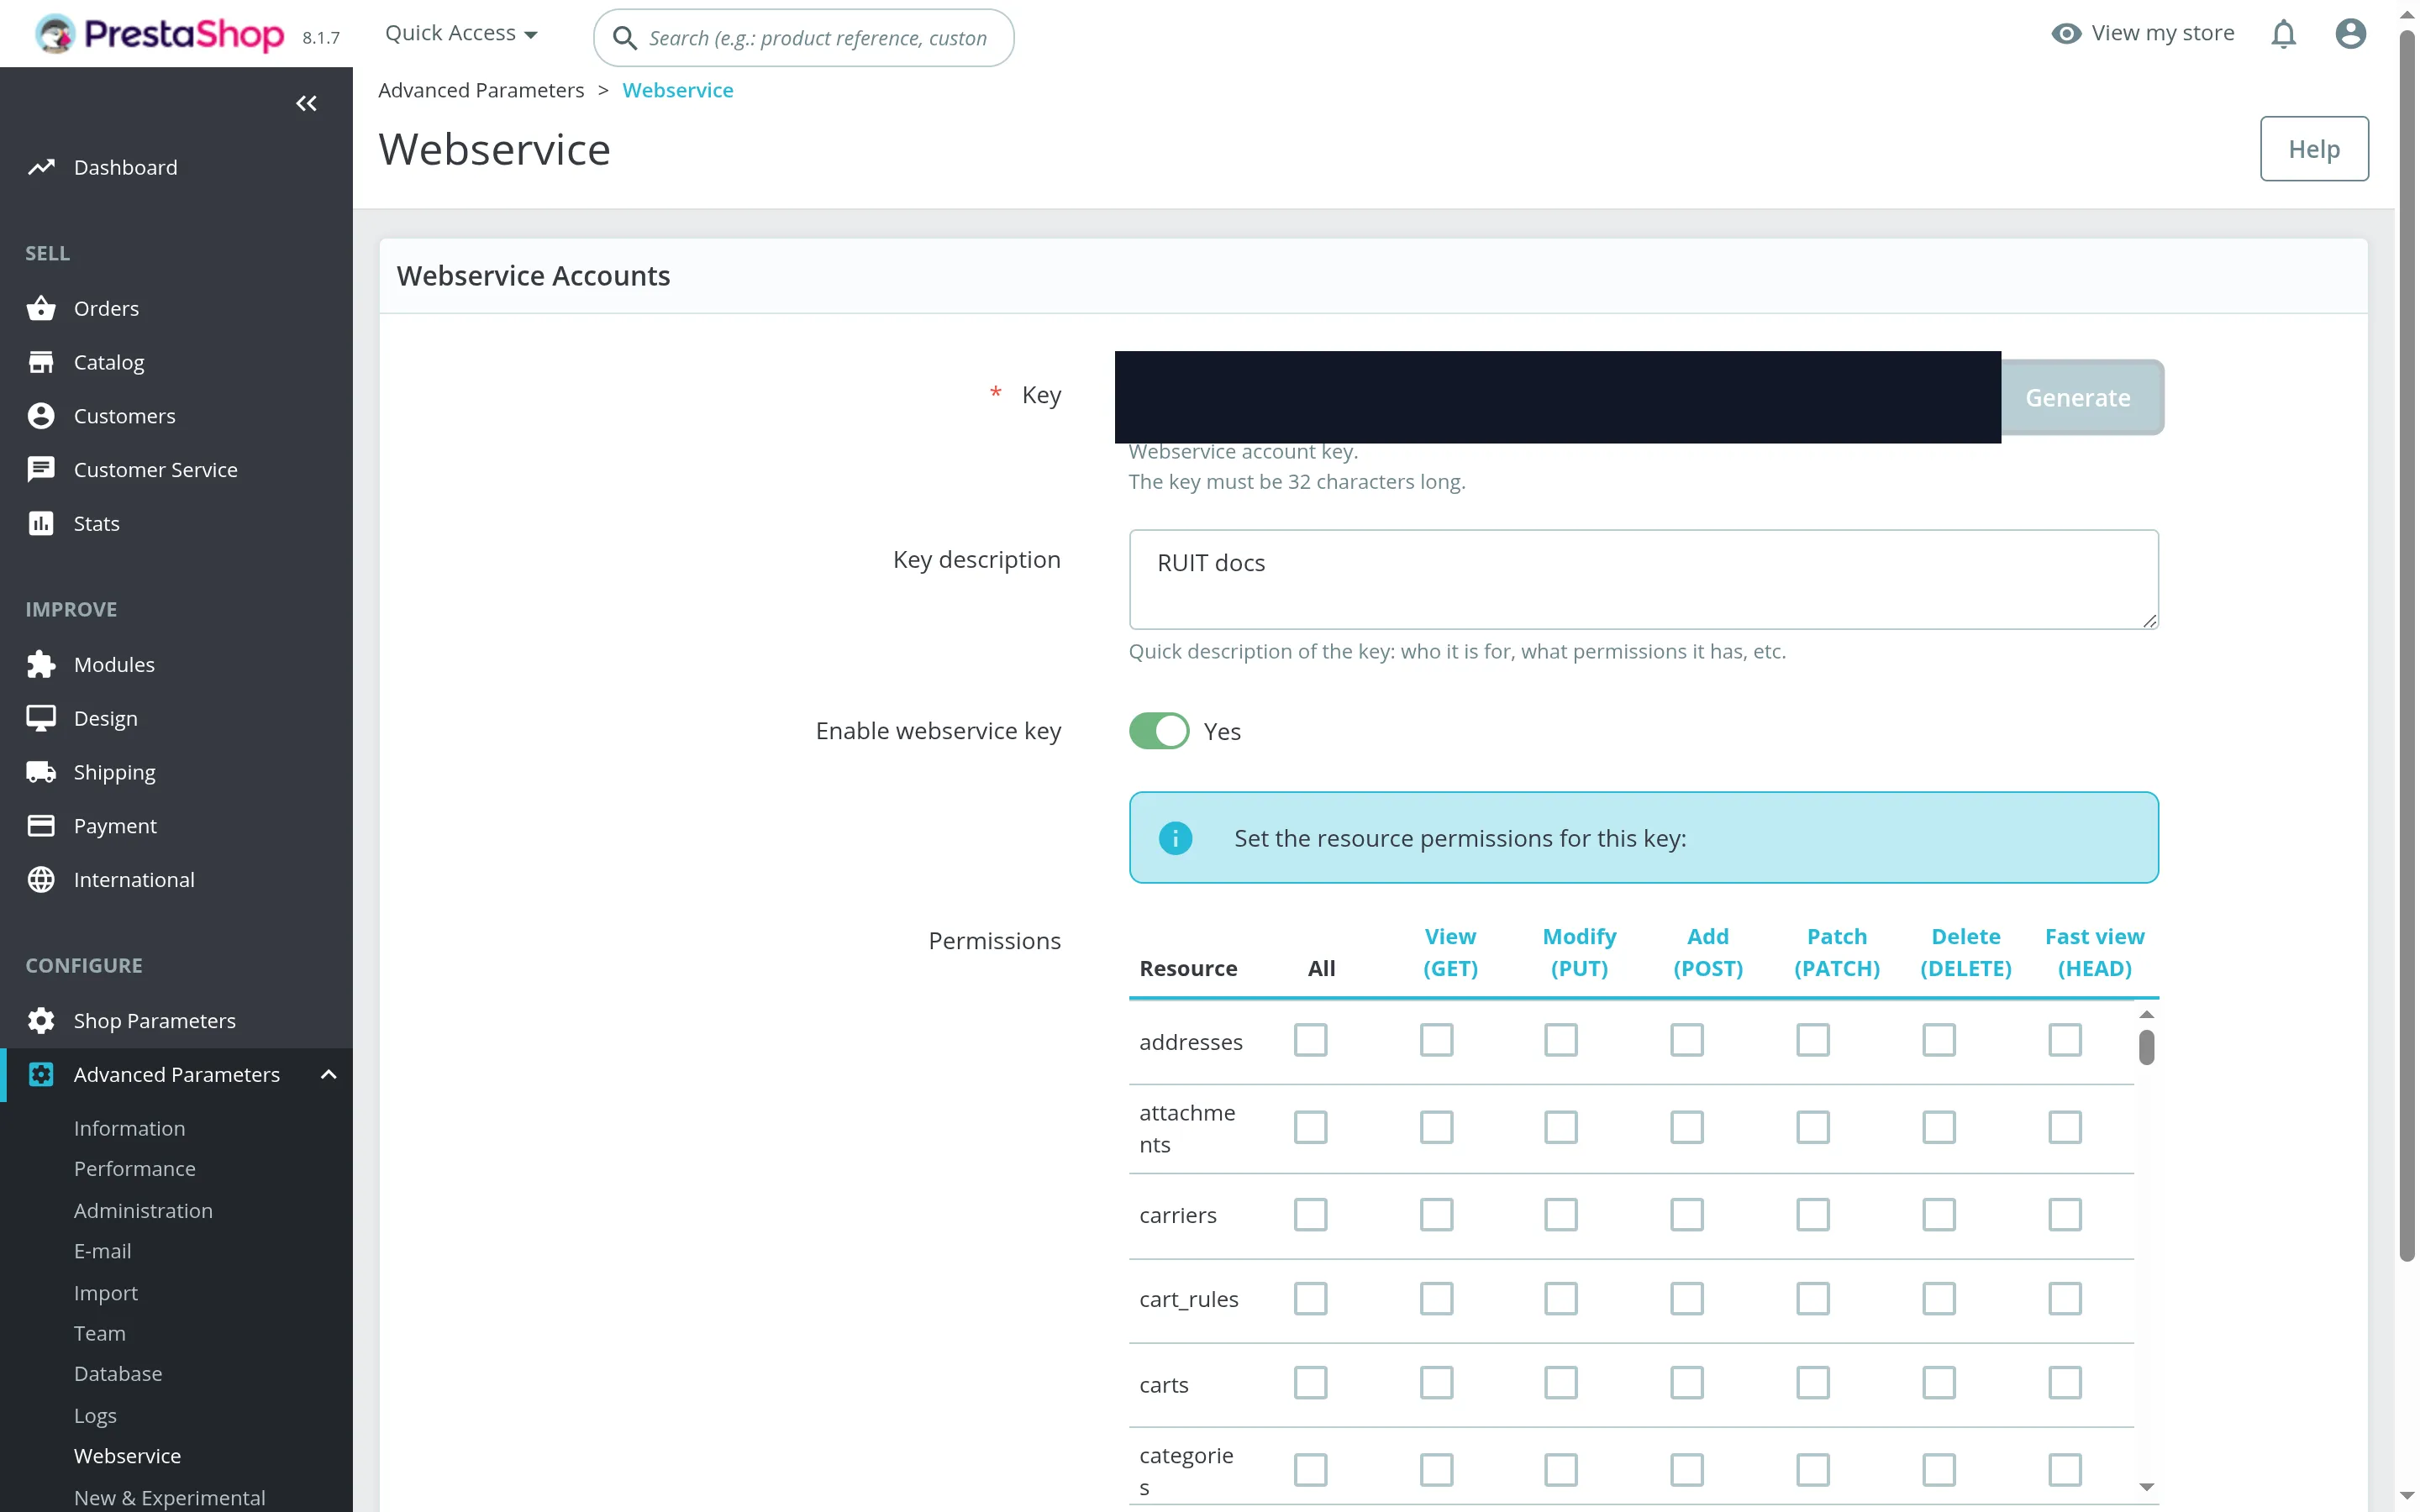
The boxes mark Generate and the description. The key is hidden: PrestaShop makes it up, 32 characters long.
3. Tick the key’s permissions
Below the form is the permissions table, one resource per row and one checkbox per action. These are the ones RUIT uses:
| Resource | View (GET) | Modify (PUT) | Add (POST) | Delete (DELETE) |
|---|---|---|---|---|
products | Yes | Yes | Yes | Yes |
combinations | Yes | Yes | Yes | |
stock_availables | Yes | Yes | ||
specific_prices | Yes | Yes | Yes | |
images | Yes | Yes | Yes | |
categories, manufacturers, product_options, product_option_values, languages, taxes, tax_rules | Yes |
Leave the Patch and Fast view columns empty. Press Save.
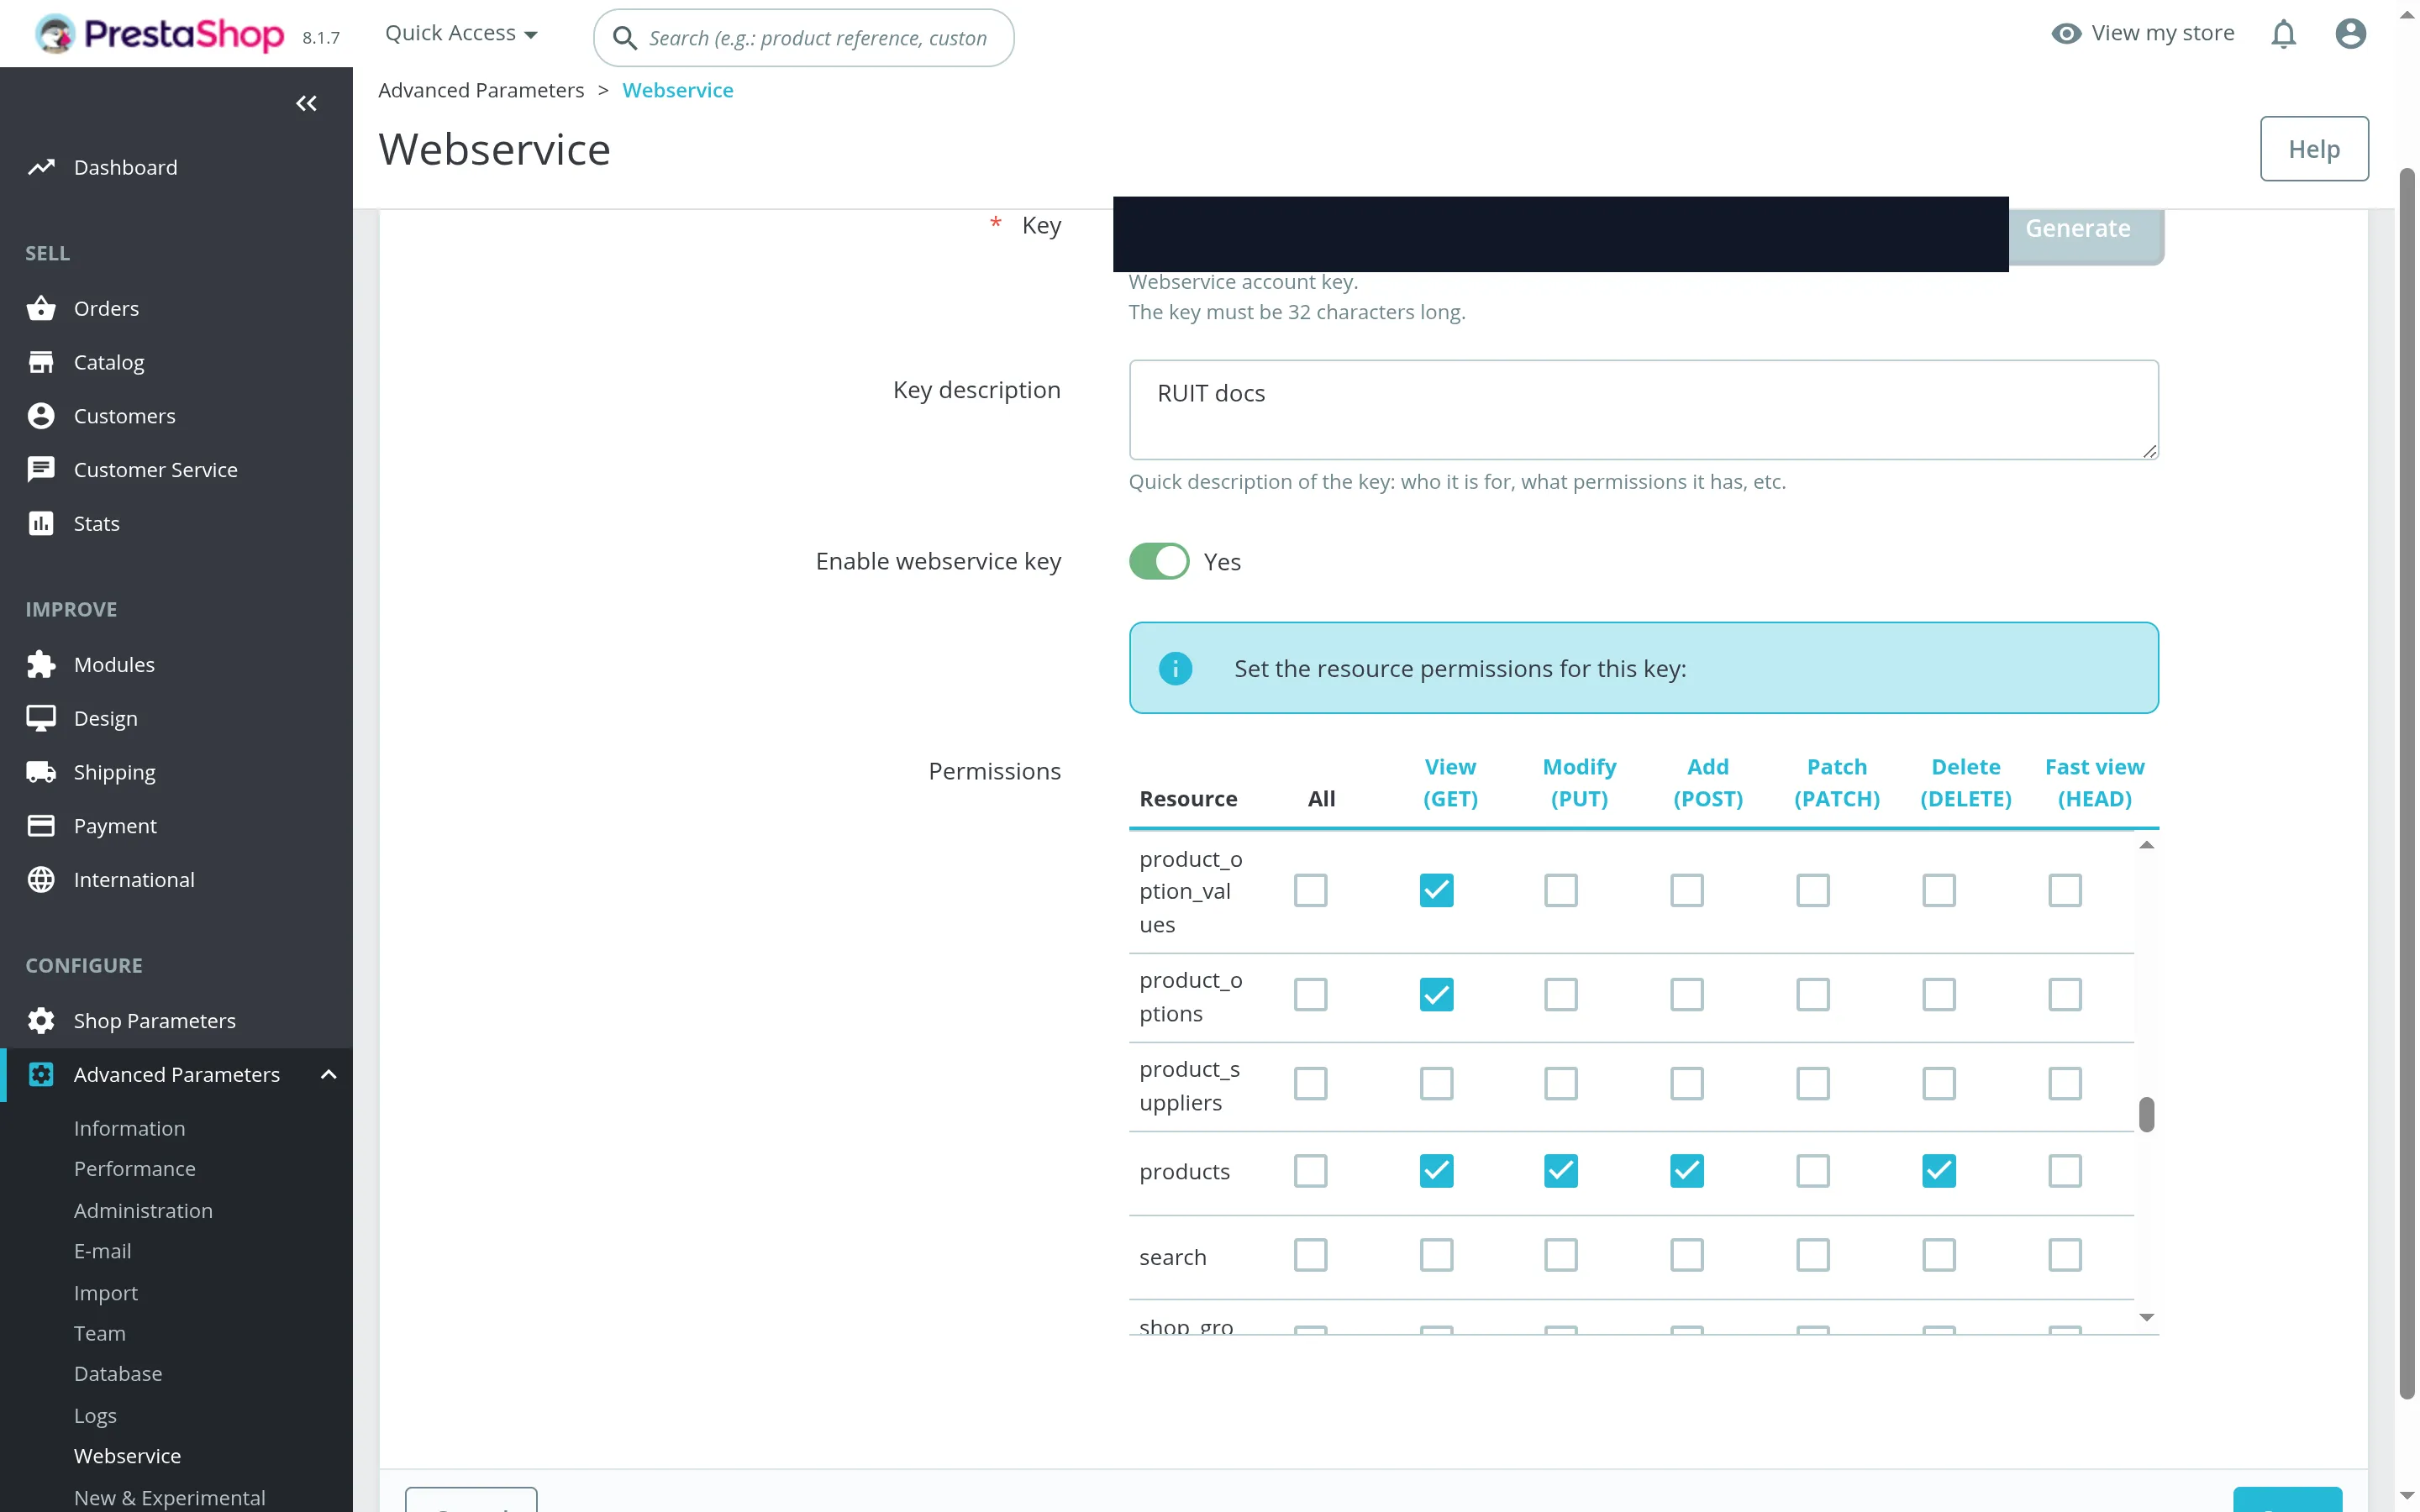
The table, scrolled down to the products row. The boxes mark the header with the columns and that row with its four boxes ticked.
4. Connect the store in RUIT
Go to Settings → Accounts, press Connect Account and pick PrestaShop. Type your store’s
address in Website (a bare domain works too: RUIT puts https:// in front of it) and paste the
key in API Key. Press Connect.
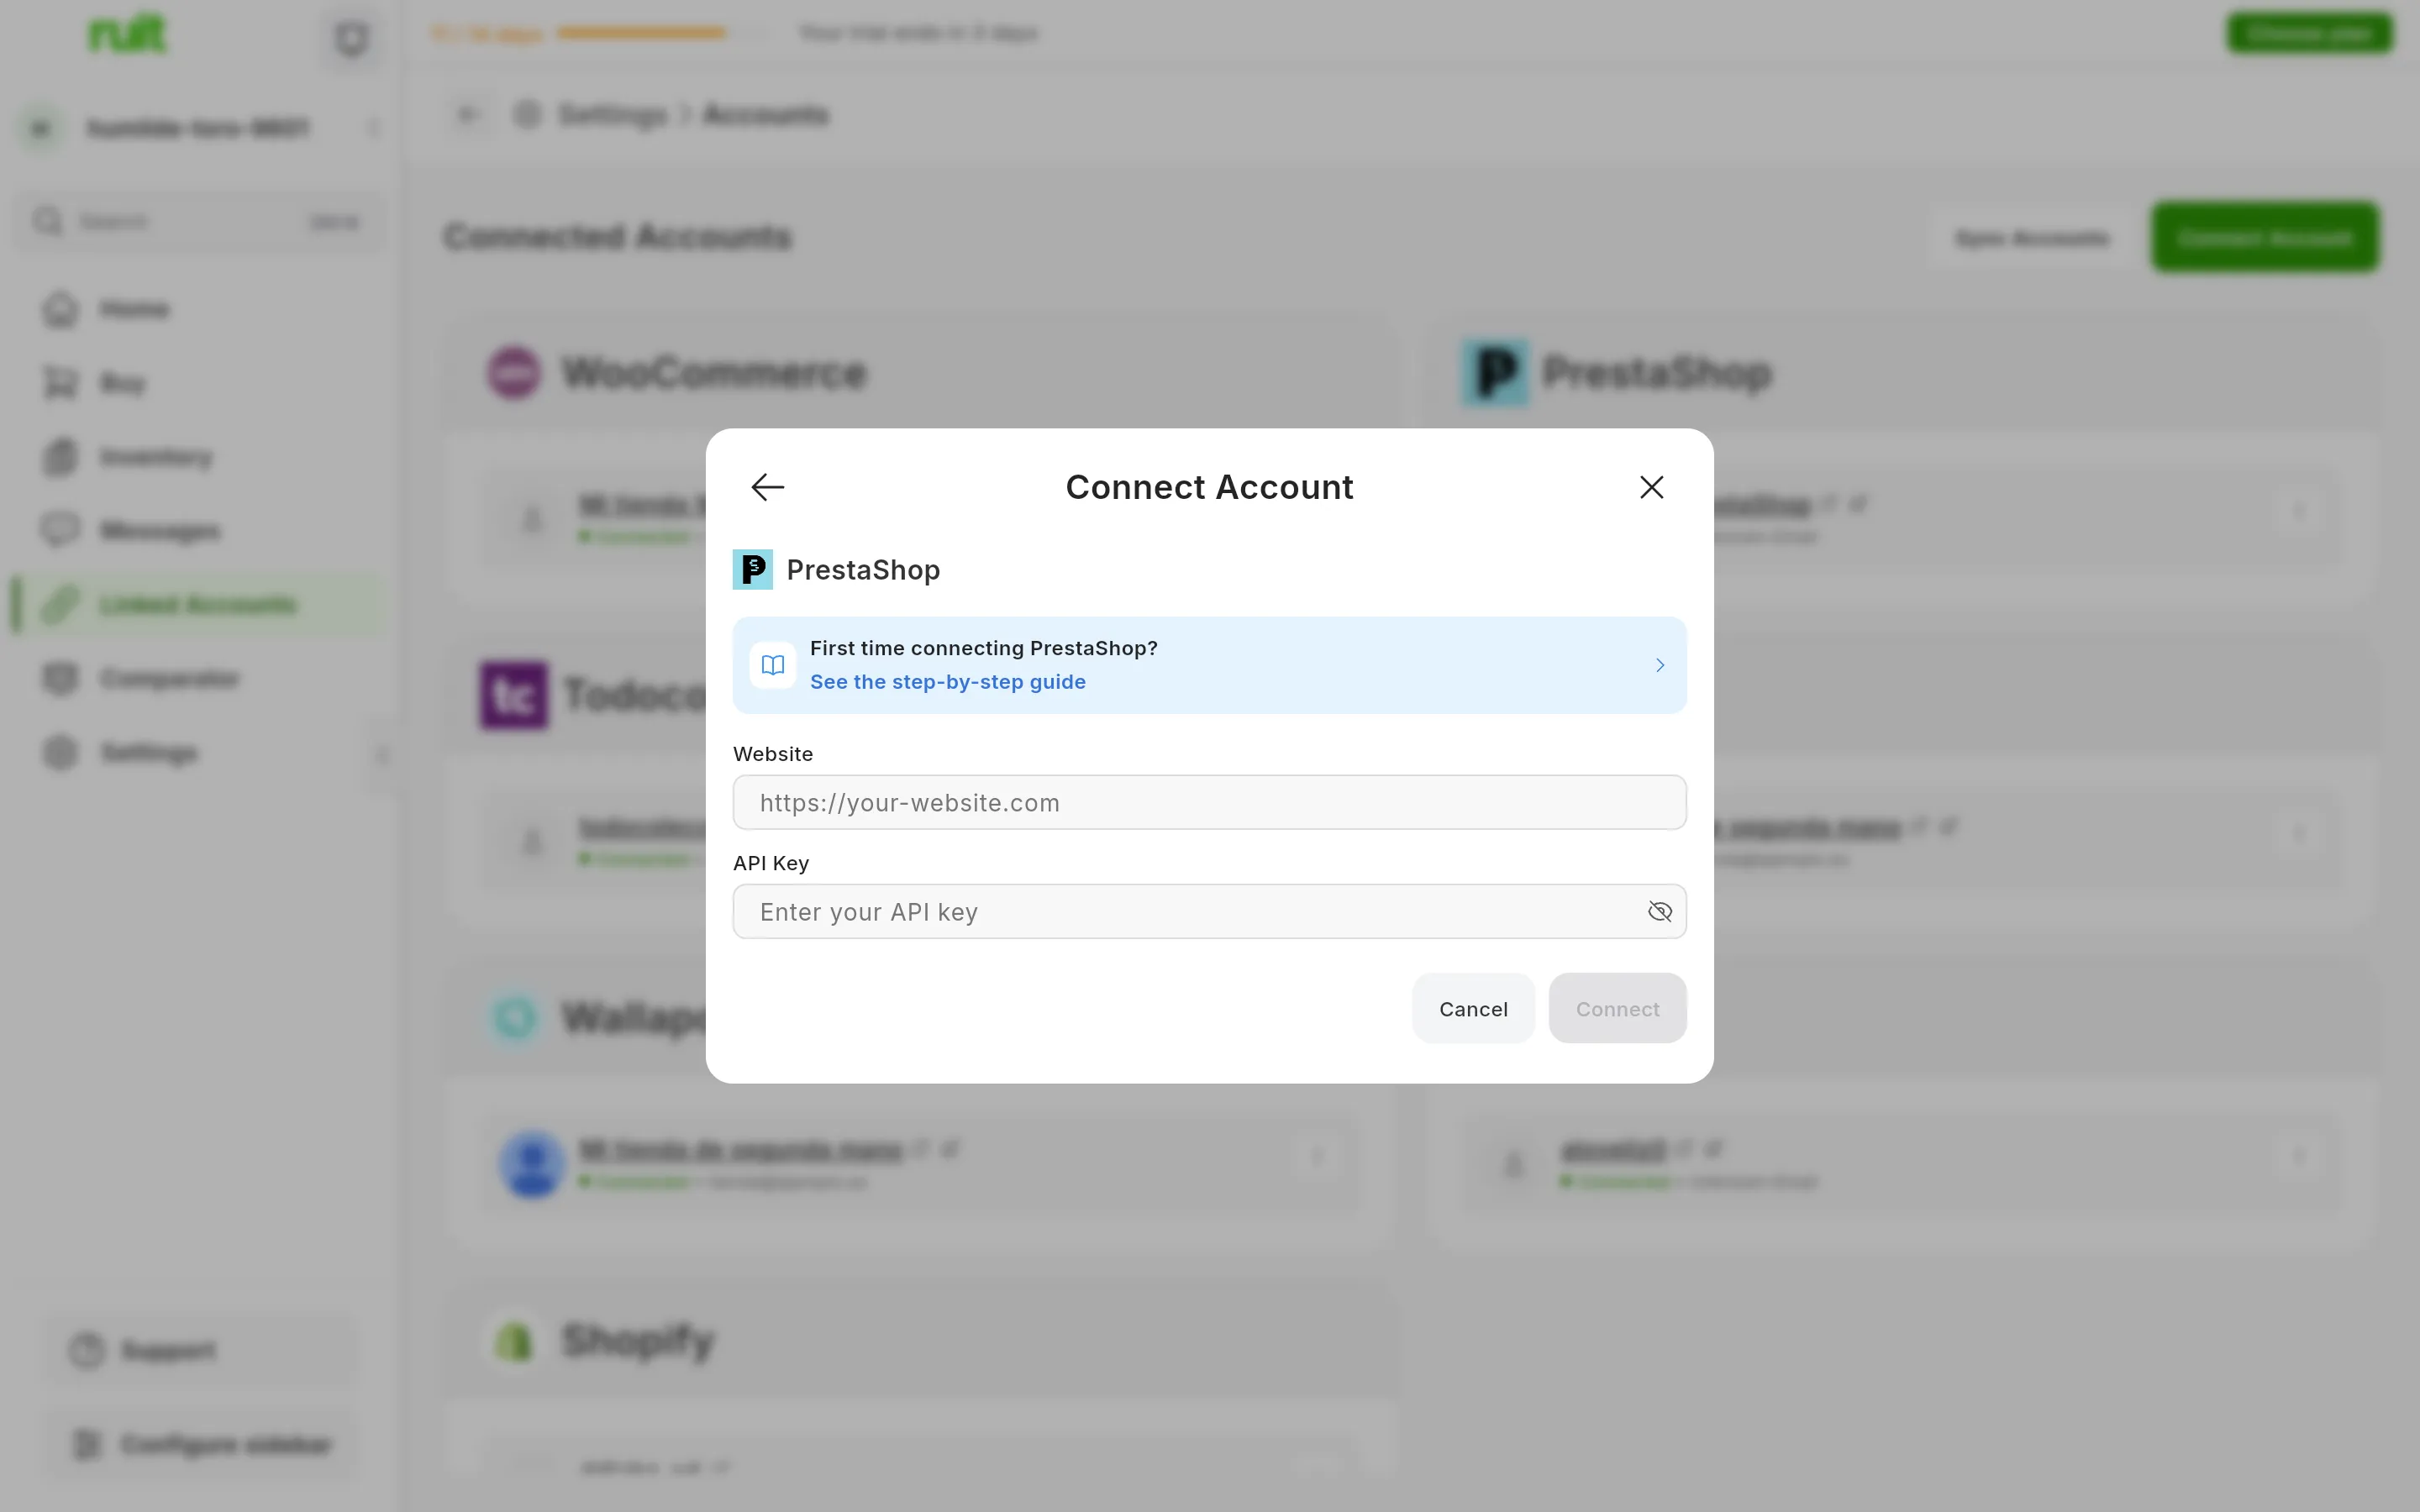
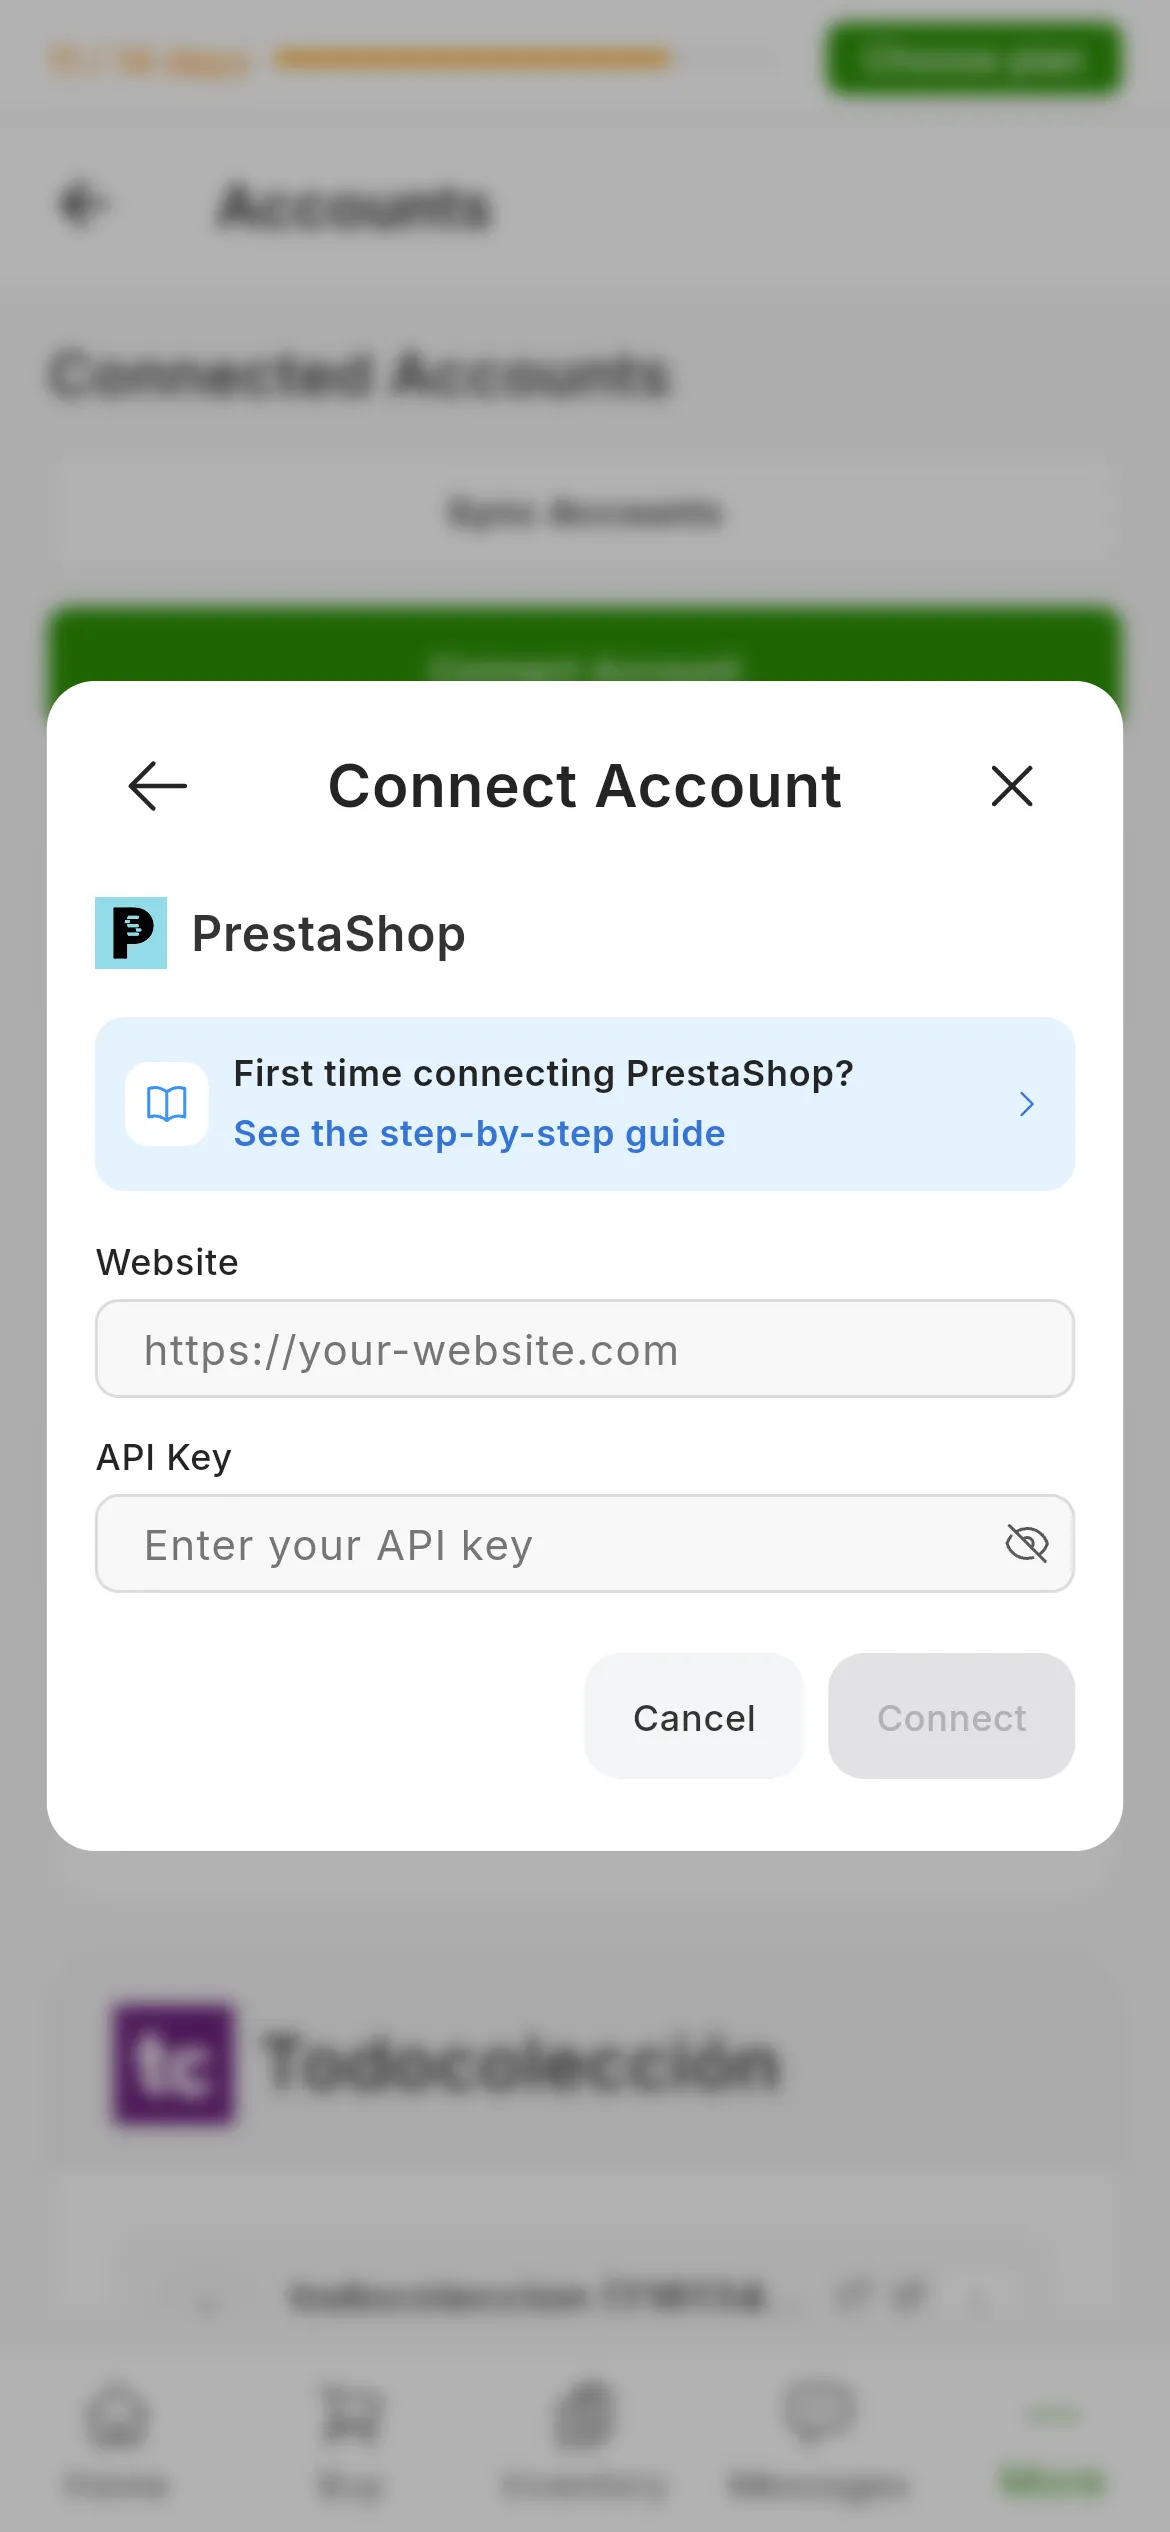
The PrestaShop dialog. The numbers mark Website and API Key. The eye icon shows the key while you check it.
RUIT tests the key by asking your store for its list of languages and keeps the first active one, which is the language it will write your product pages in.
What you have achieved
Your store appears under Connected Accounts with its PrestaShop card. The key does not expire, so the card does not have the Reconnect button that Wallapop and Vinted do: the connection lasts until you delete the key from your admin panel.
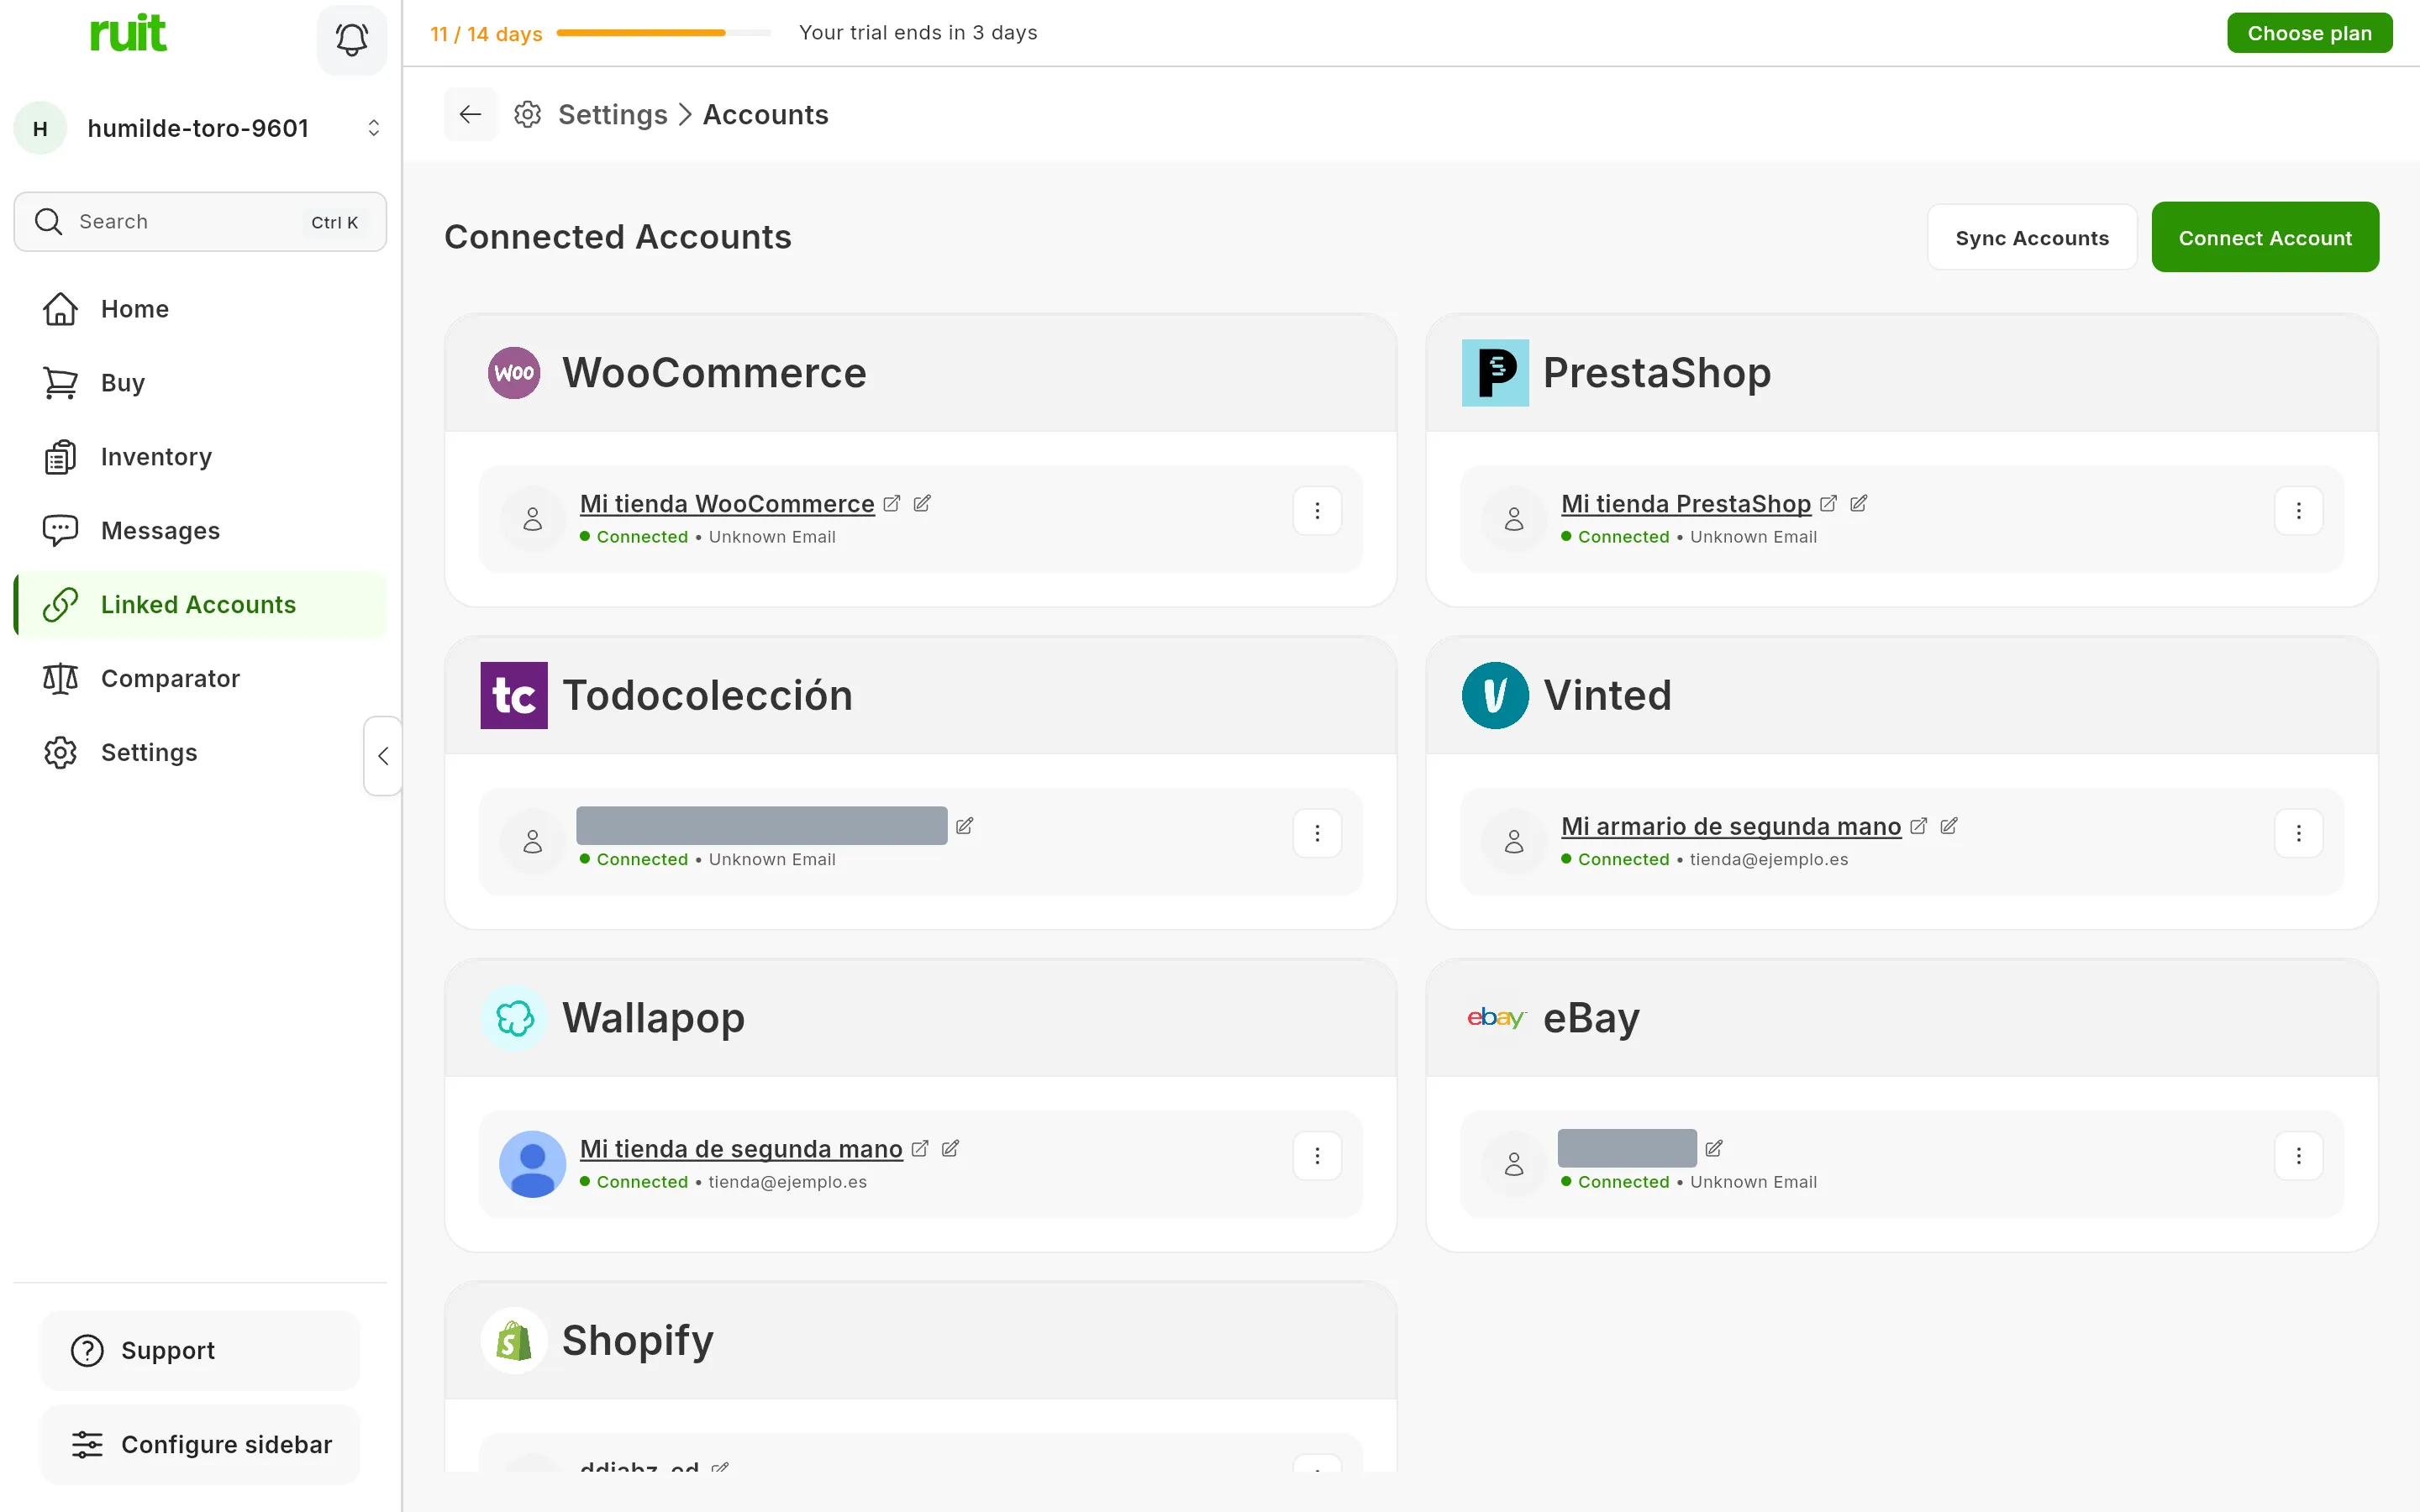
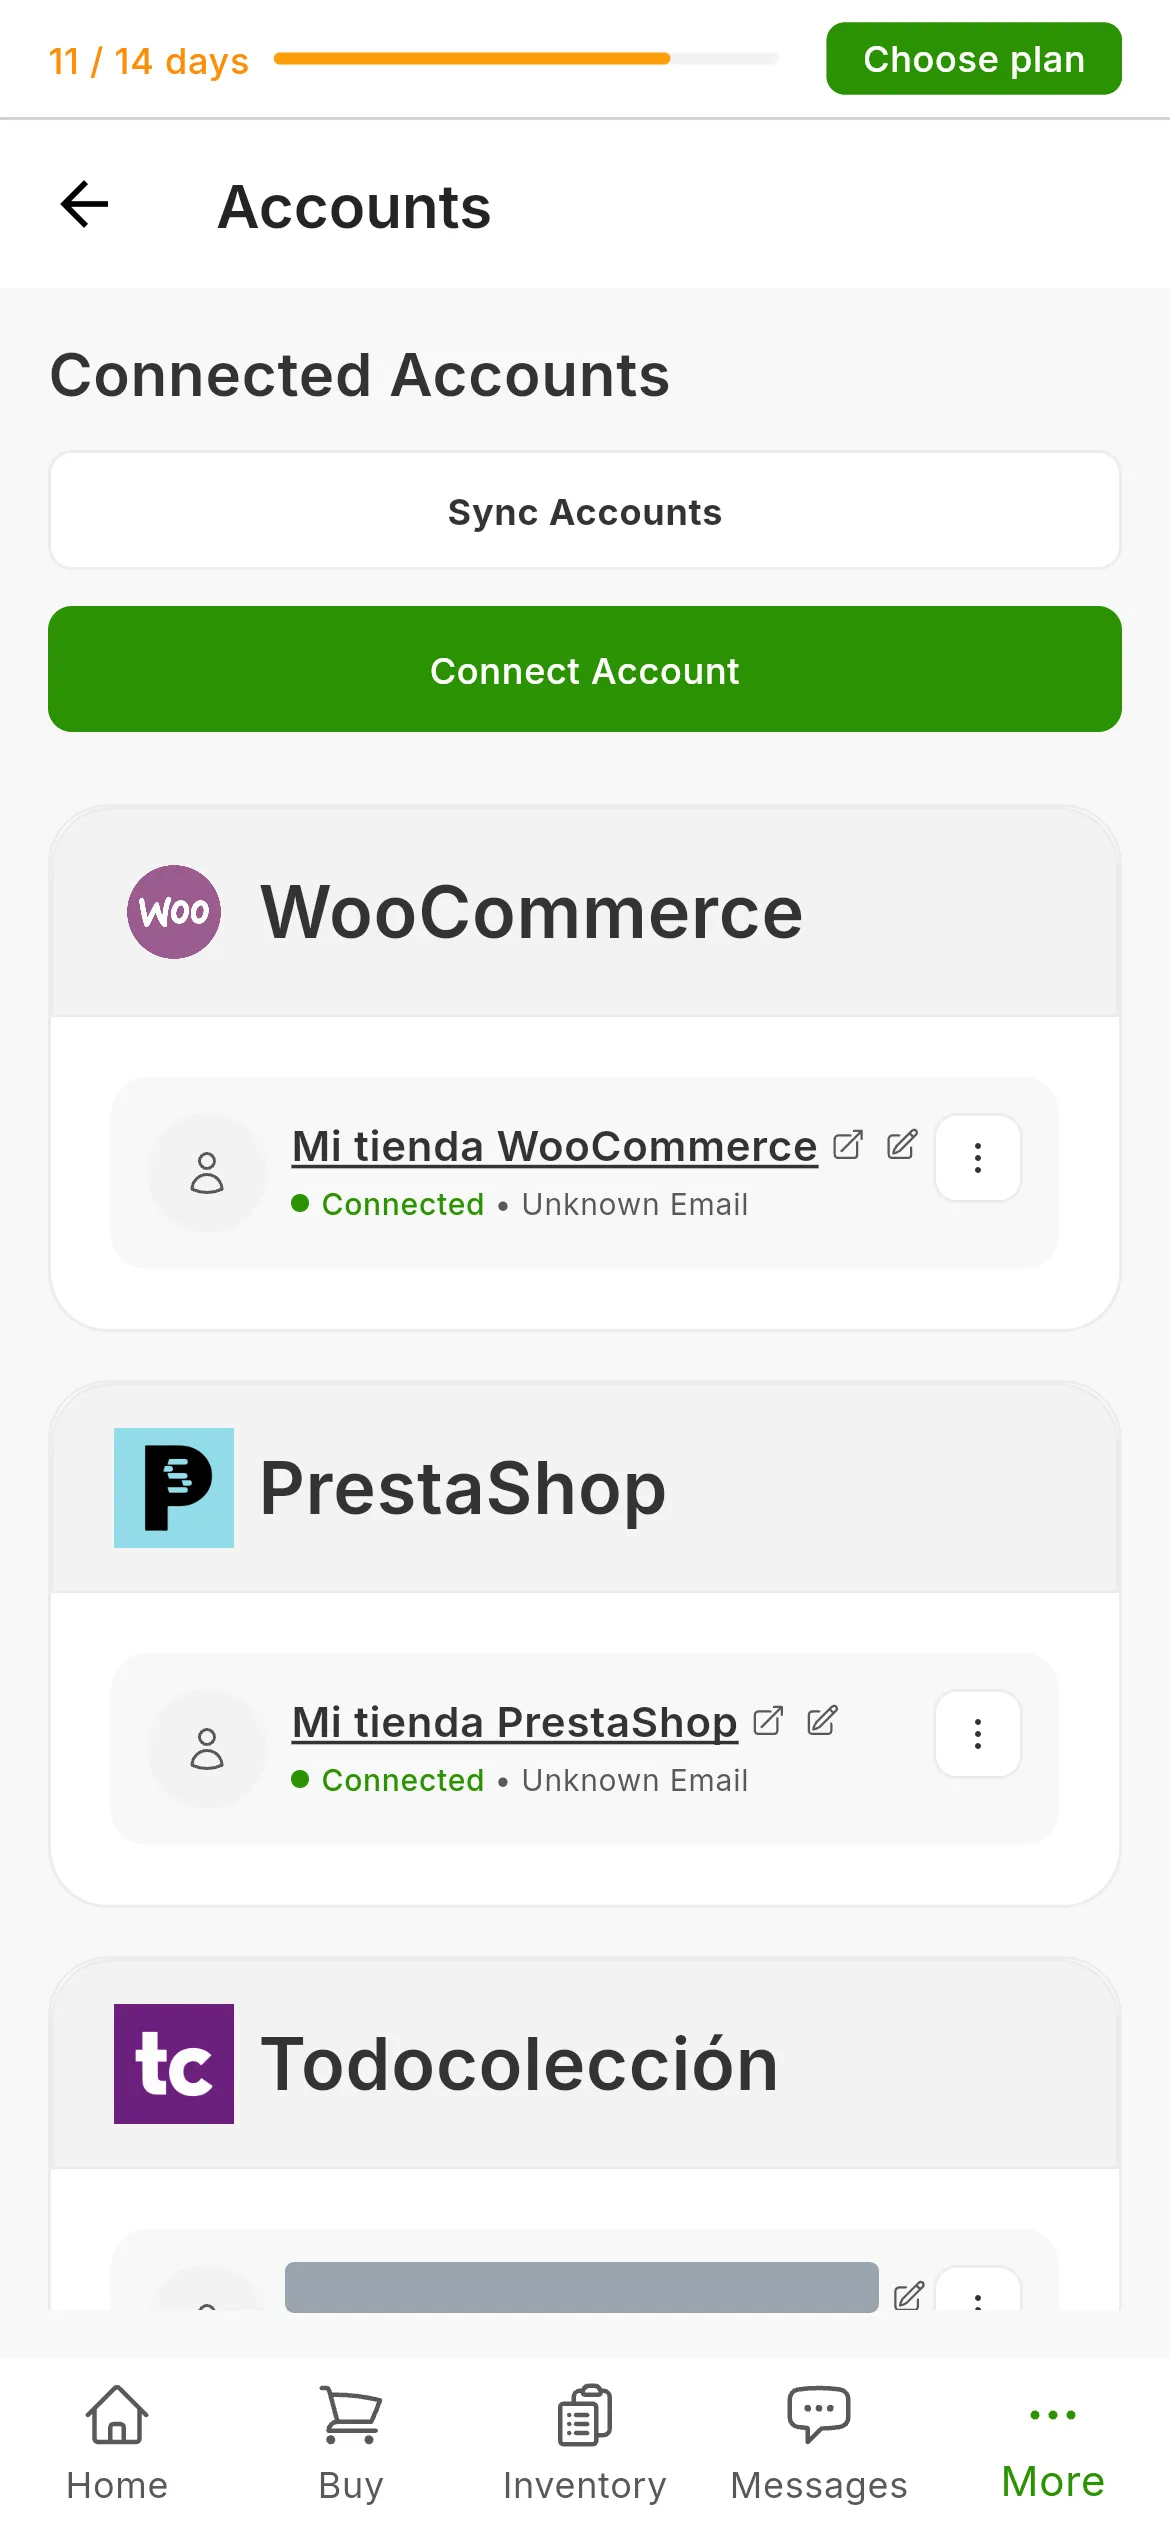
The PrestaShop store among the connected accounts, with whatever name you gave it.
Next step: importing from a marketplace to bring in the products you already have in the store, or publishing your first listing.
If something is off
- “Failed to verify credentials. Please check your API keys and store URL.” Your store did not
answer the way RUIT expected. Check, in this order, that the web service is enabled (step 1),
that the key is copied in full and has permission to view
languages(step 3), and that the address is the store’s and not the admin panel’s. - “Invalid credentials format.” The key is shorter than 8 characters: you have pasted only part of it. PrestaShop keys are 32 characters long.
- “The URL must use HTTPS (not HTTP).” RUIT does not connect stores without
https://. Put a certificate on the store and try again. - The import warns you about taxes. The key is missing view access to
taxesandtax_rules. Tick those two boxes in step 3 and run the import again; there is no need to connect again. - Publishing fails and names a resource. A permission is missing from the table in step 3. Tick it and publish again.
Video
Video not recorded yet: Connecting a PrestaShop store
Did this article help?
Thanks for telling us.