Connect WooCommerce to RUIT
Connect WooCommerce to RUIT: type your store's address and approve access from WordPress, or create a set of API keys and paste them into RUIT.
In this tutorial you connect your WooCommerce store to RUIT. There are two routes and both end in the same place: authorizing from your own store, which is the short one (you type its address, approve in your WordPress and come back), or pasting in a set of keys that you generate yourself in WooCommerce. It takes five minutes and you only do it once.
You need to be an administrator of the store, WooCommerce 3.5 or later and the store served
over https:// at the root of its domain, like https://yourstore.com. You also need a
verified phone, because without it the connection wizard does not
open.
1. Type your store’s address into RUIT
Go to Settings → Accounts, press Connect Account and pick WooCommerce. Type your store’s address in Website.
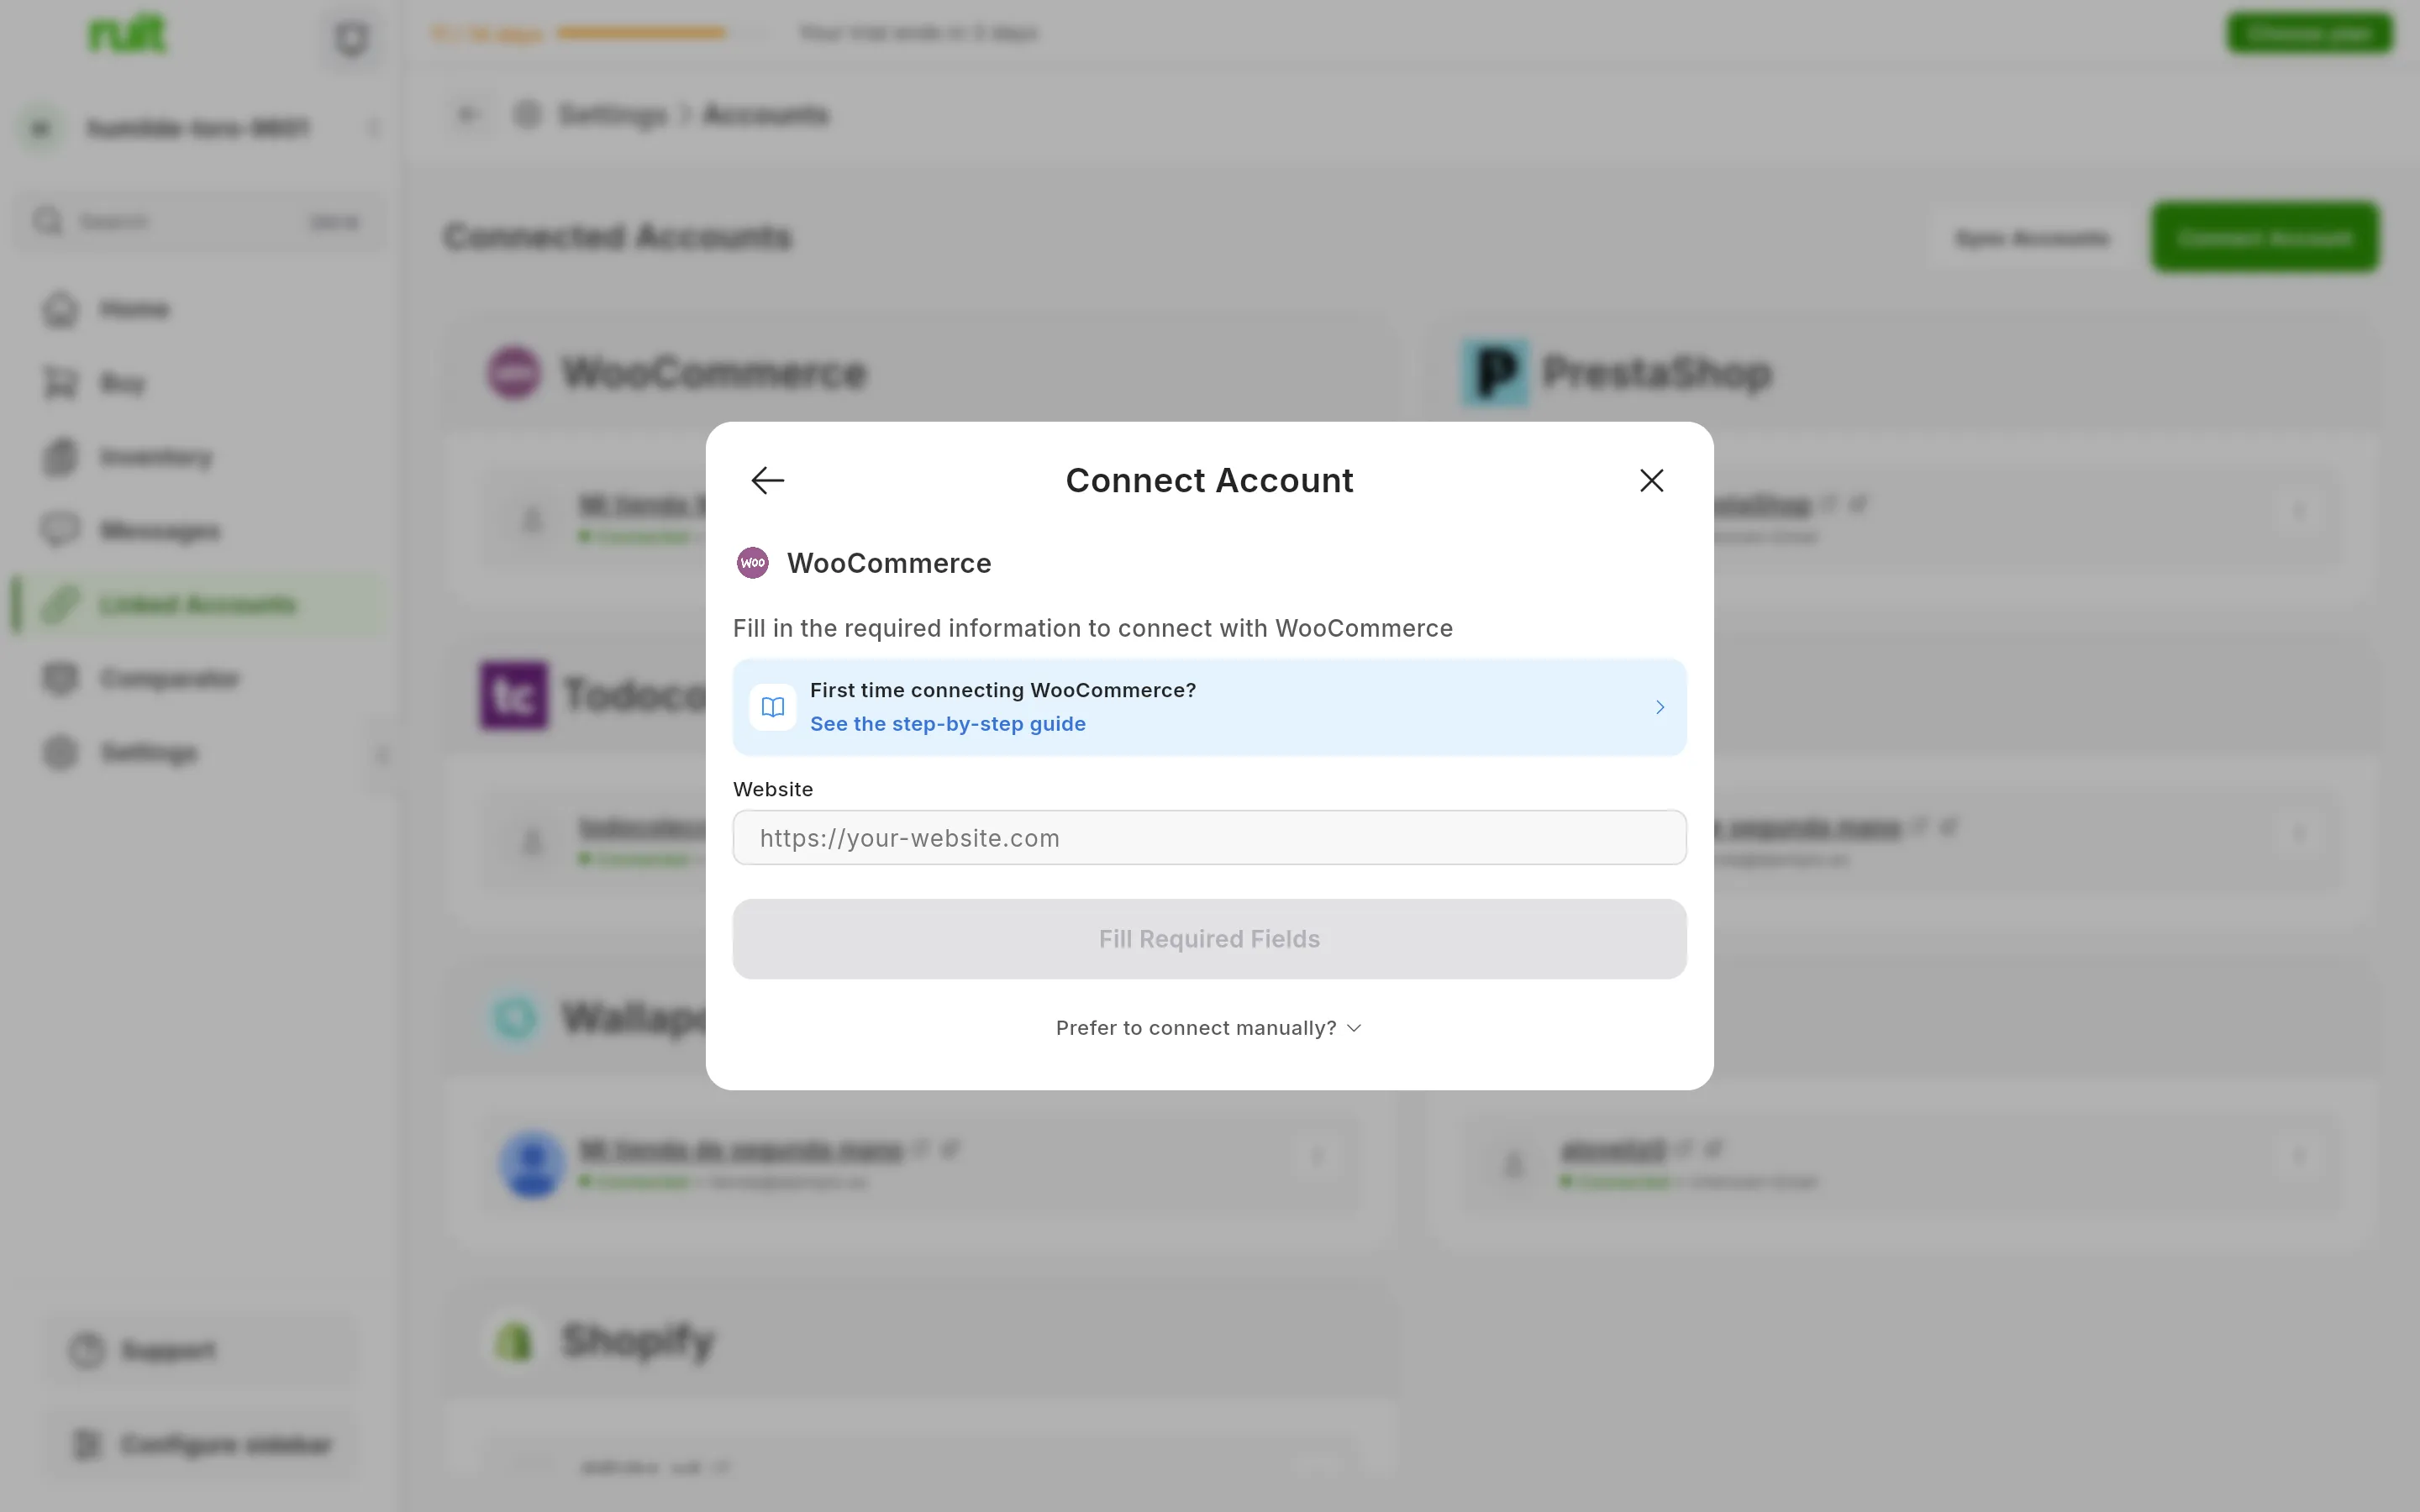
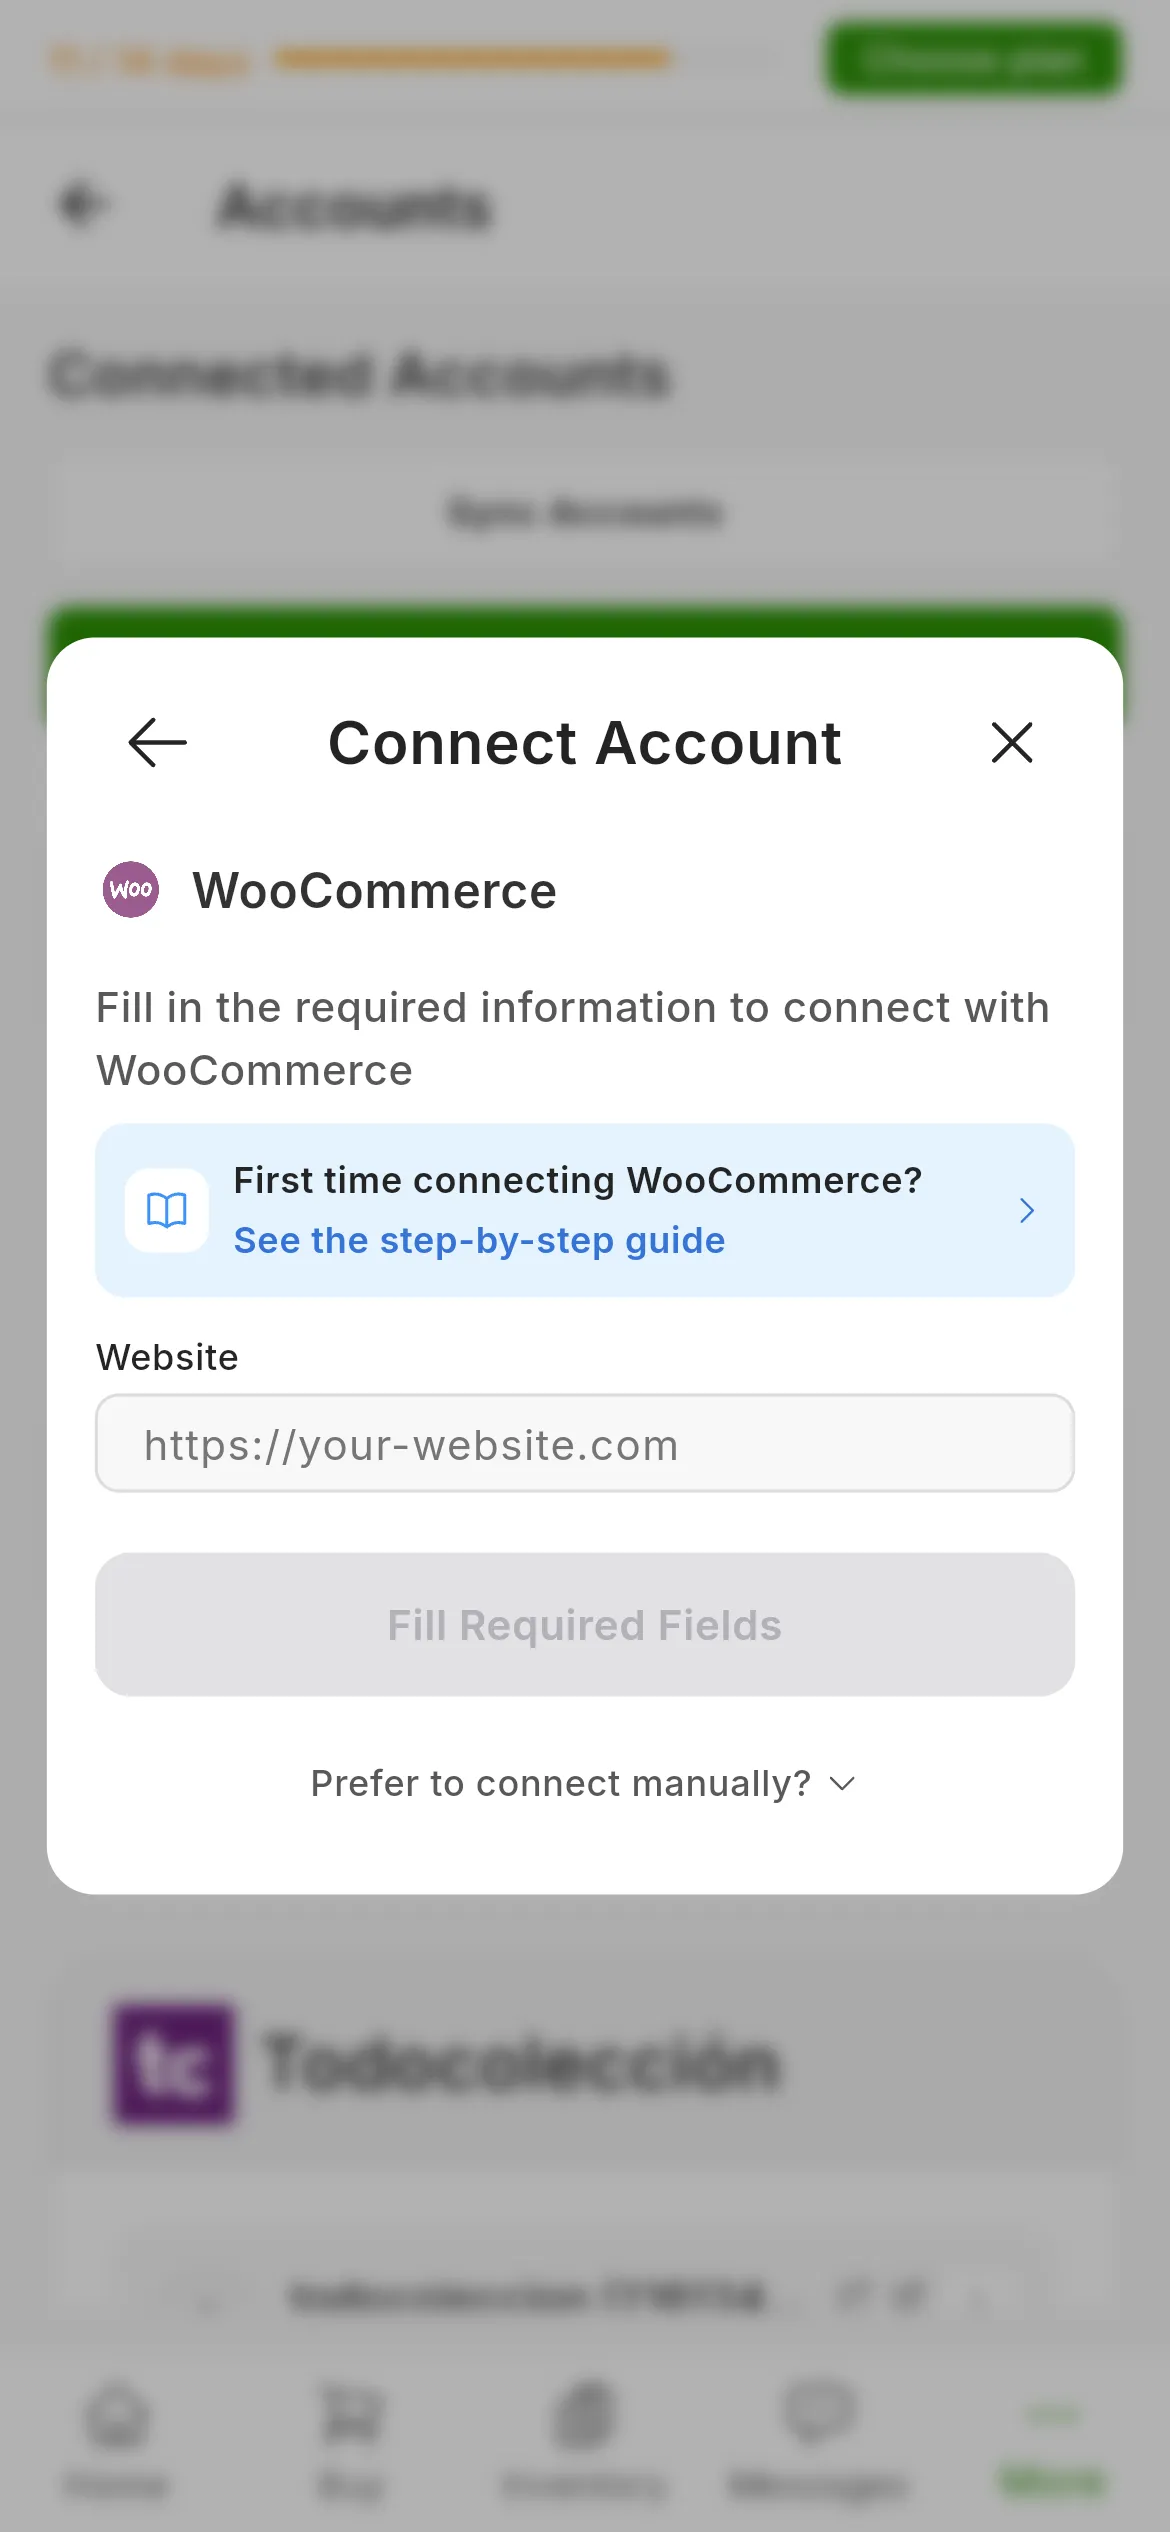
The WooCommerce dialog. The number marks Website. Below the button, Prefer to connect manually? opens up the keys route, which is step 4.
2. Approve access from your store
Press Connect with WooCommerce. While the address is empty the button says Fill Required Fields; once it is filled in, the button takes you to your own store’s authorization screen. If you are not signed in as an administrator, WordPress asks you to sign in first.
The screen says what RUIT is asking for: Read/Write access to your store, which is what it needs to publish products, keep the stock up to date and hear about sales. Press Approve.
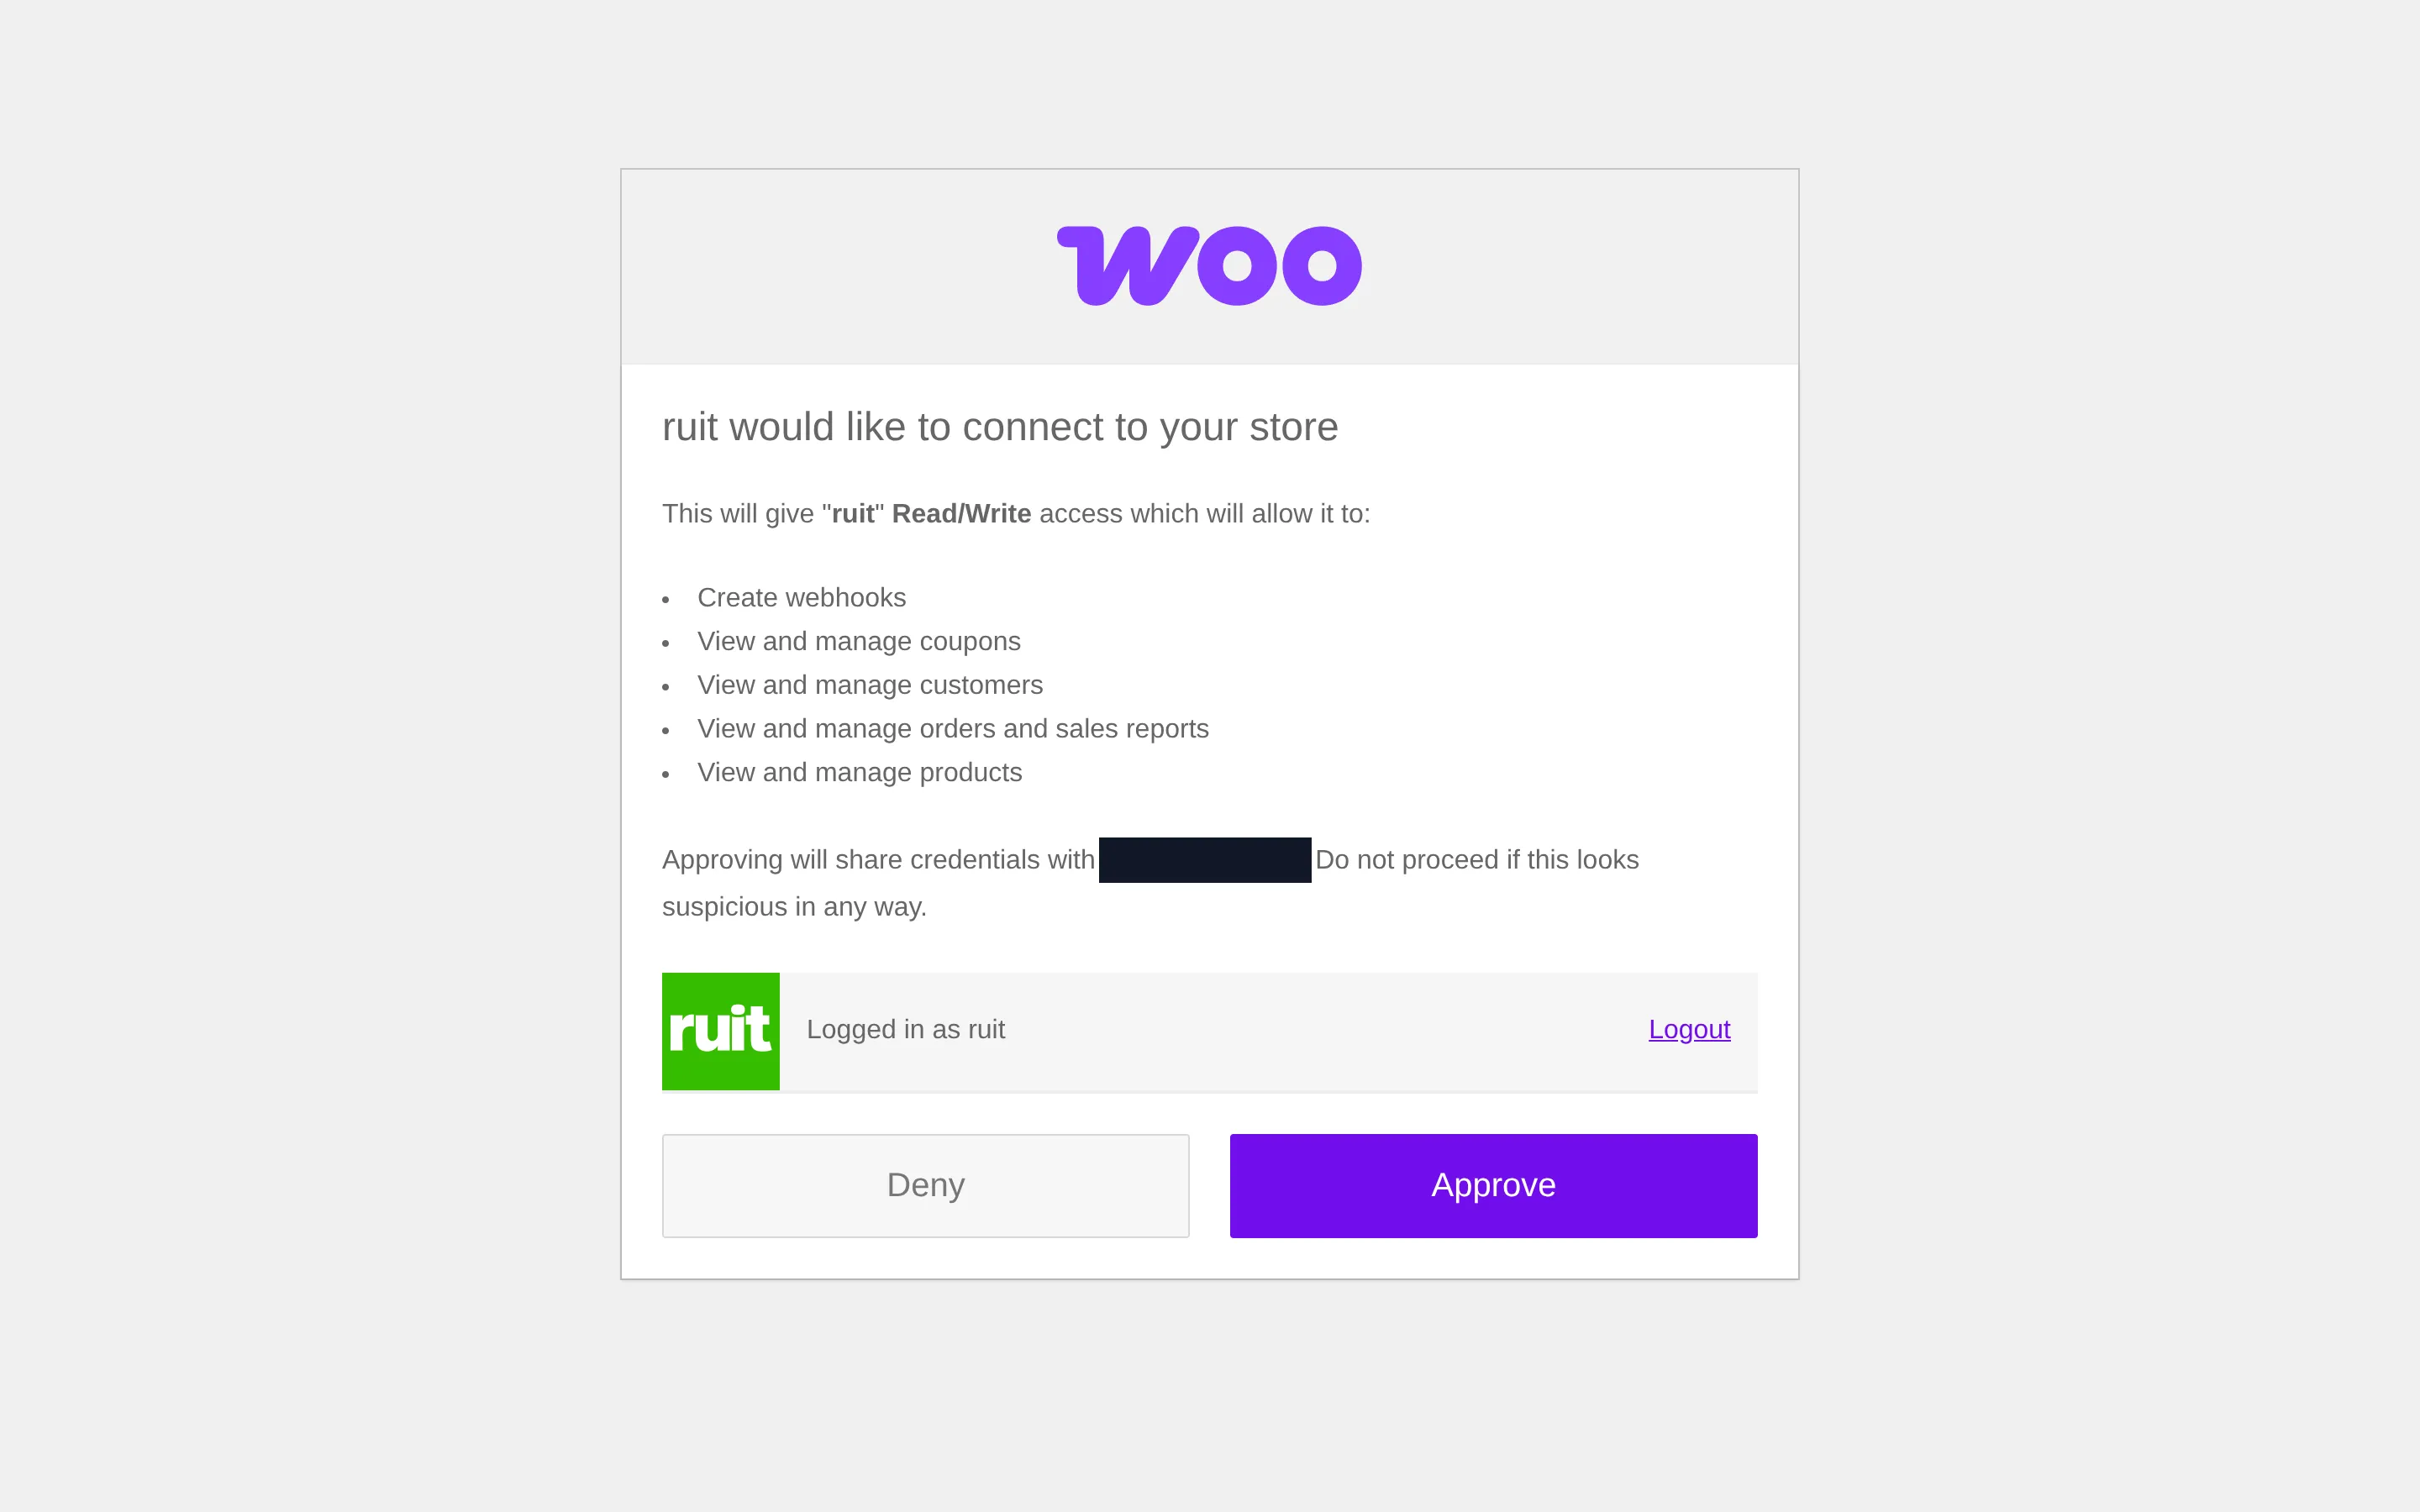
The authorization, as seen on a store with its admin panel in English. The box marks Approve; on your store the labels appear in the language of your WordPress.
3. Go back to RUIT
Your store generates a pair of keys and sends them to RUIT by itself; RUIT checks them against your store, saves the account and shows you WooCommerce connected. Press See my accounts and skip to “What you have achieved”.
4. Or paste the keys by hand
If your store will not let you approve, or you would rather create the key yourself, the other route is a set of WooCommerce API keys. You generate them in your WordPress, under WooCommerce → Settings → Advanced → REST API, with the Add key button.
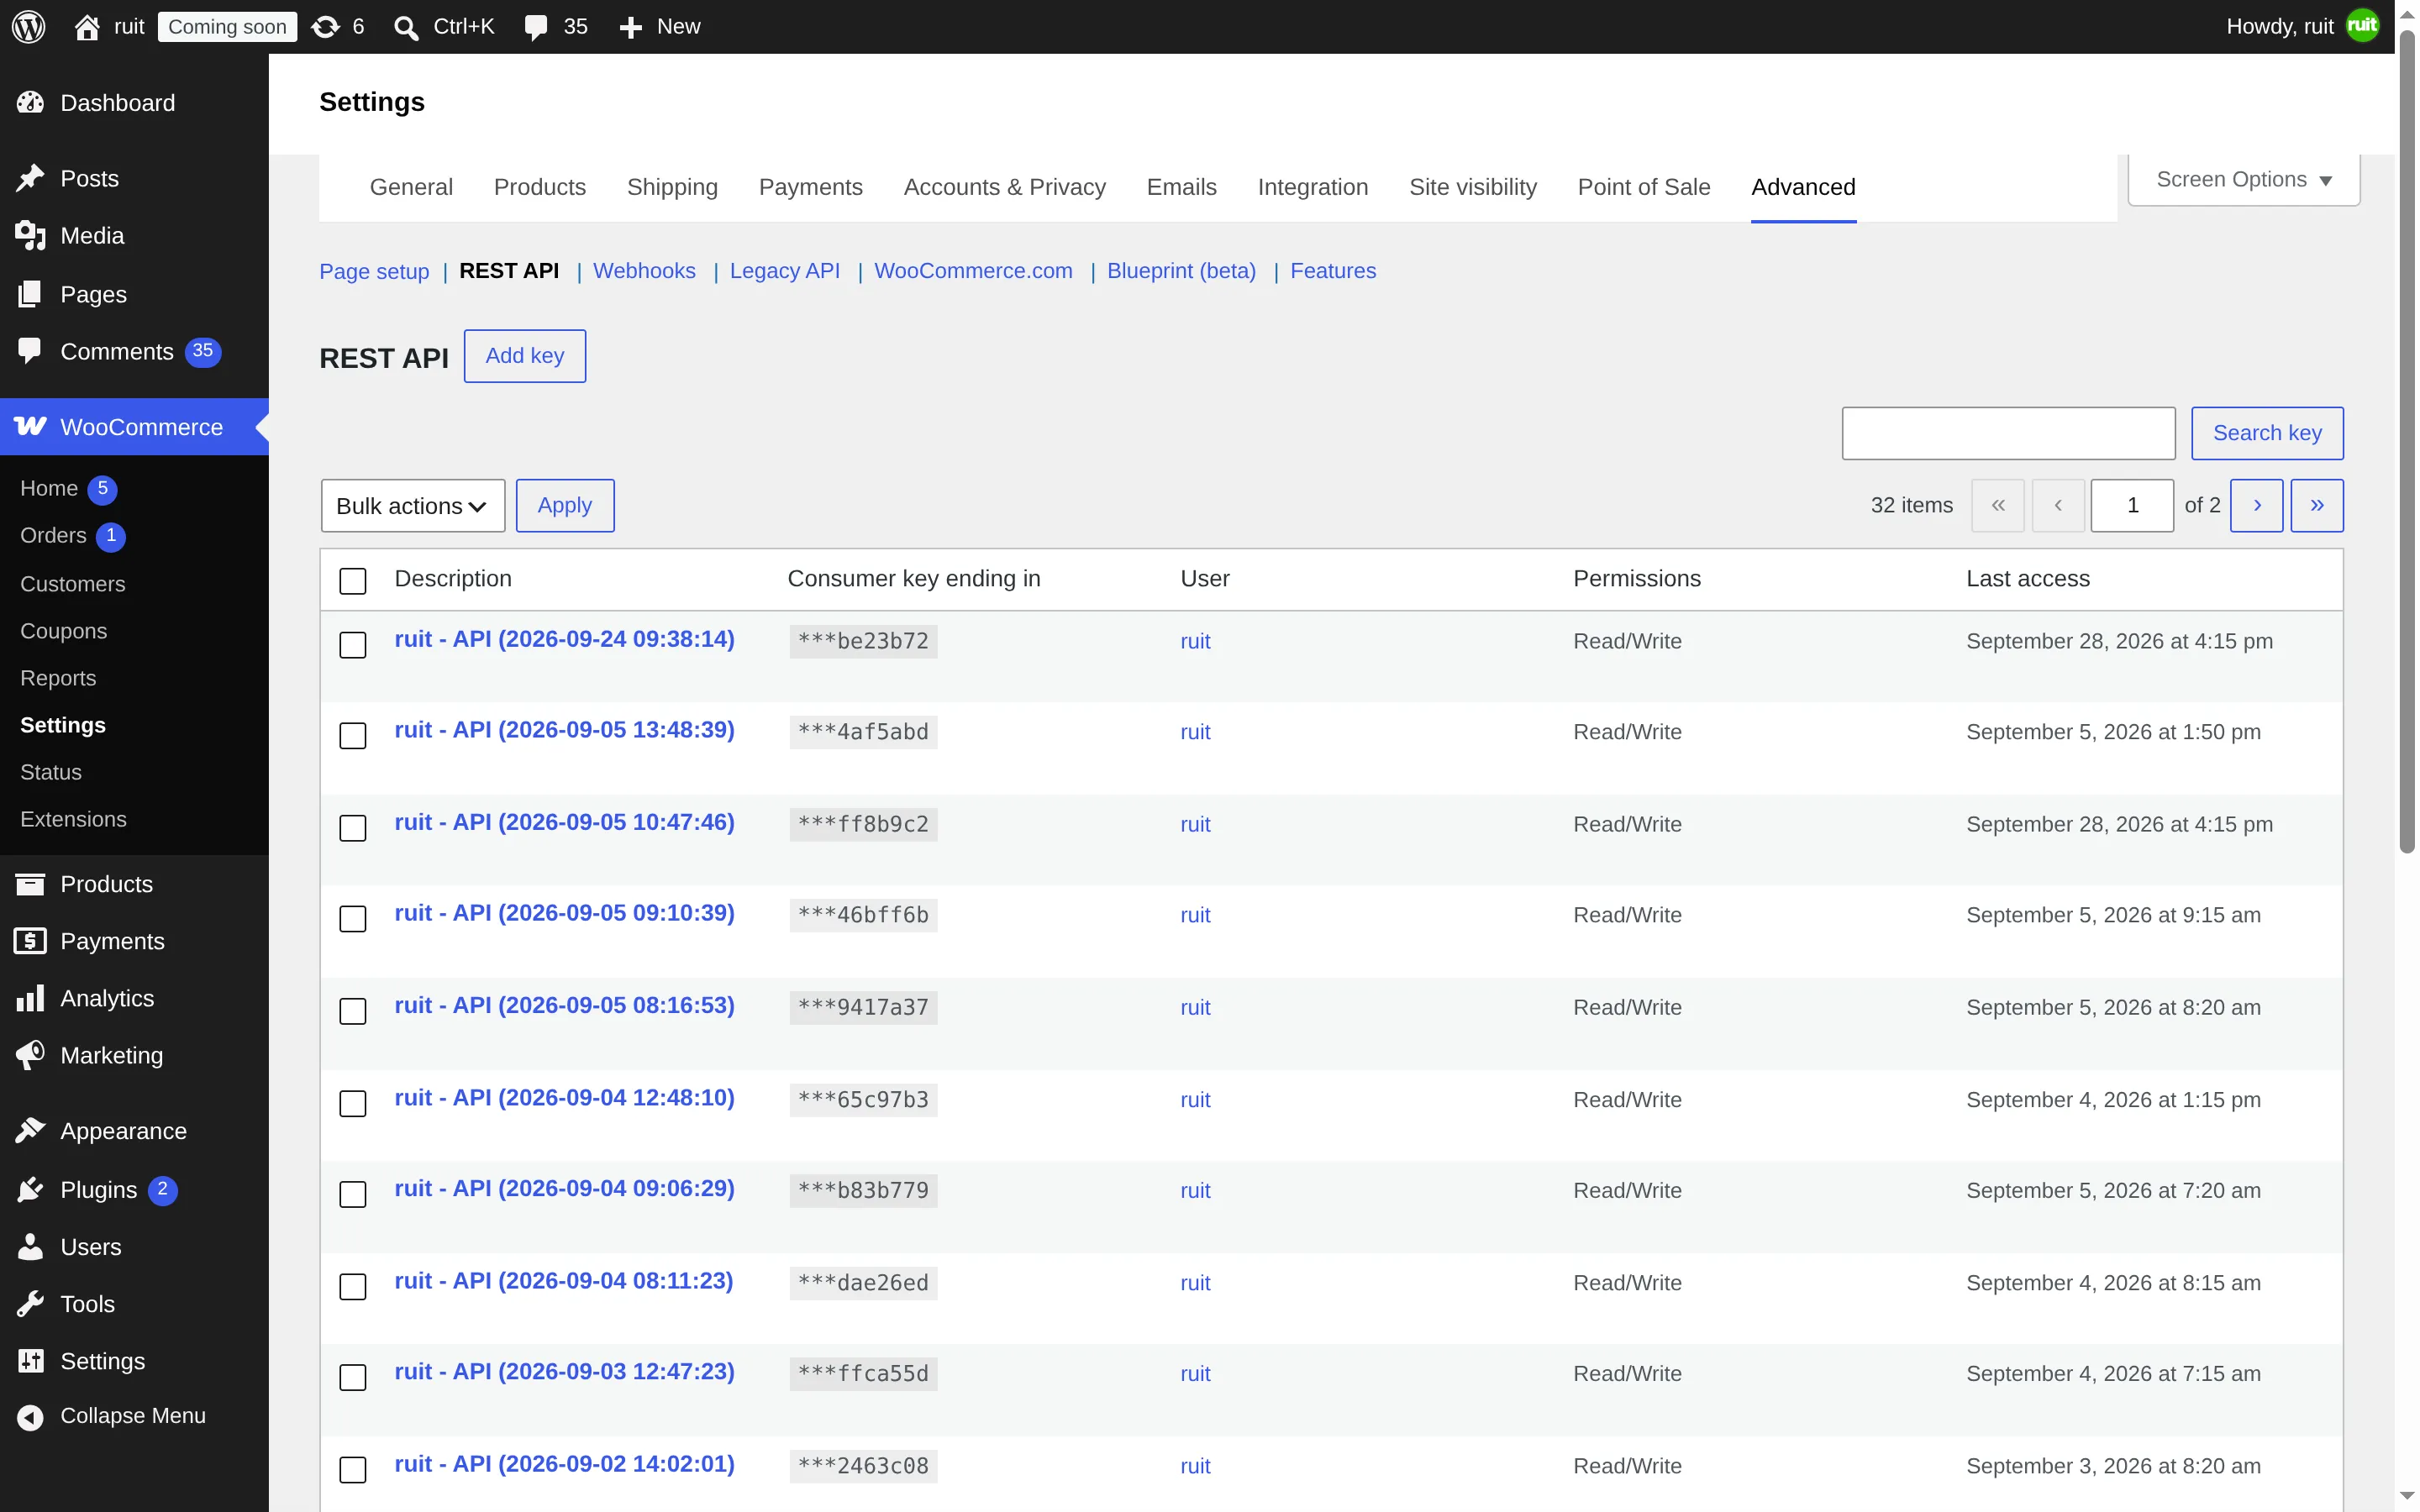
The list of your store’s keys, with the admin panel in English. The box marks Add key.
Give it a description you will recognize, choose an administrator as the user and, under permissions, Read/Write. Press Generate API key.
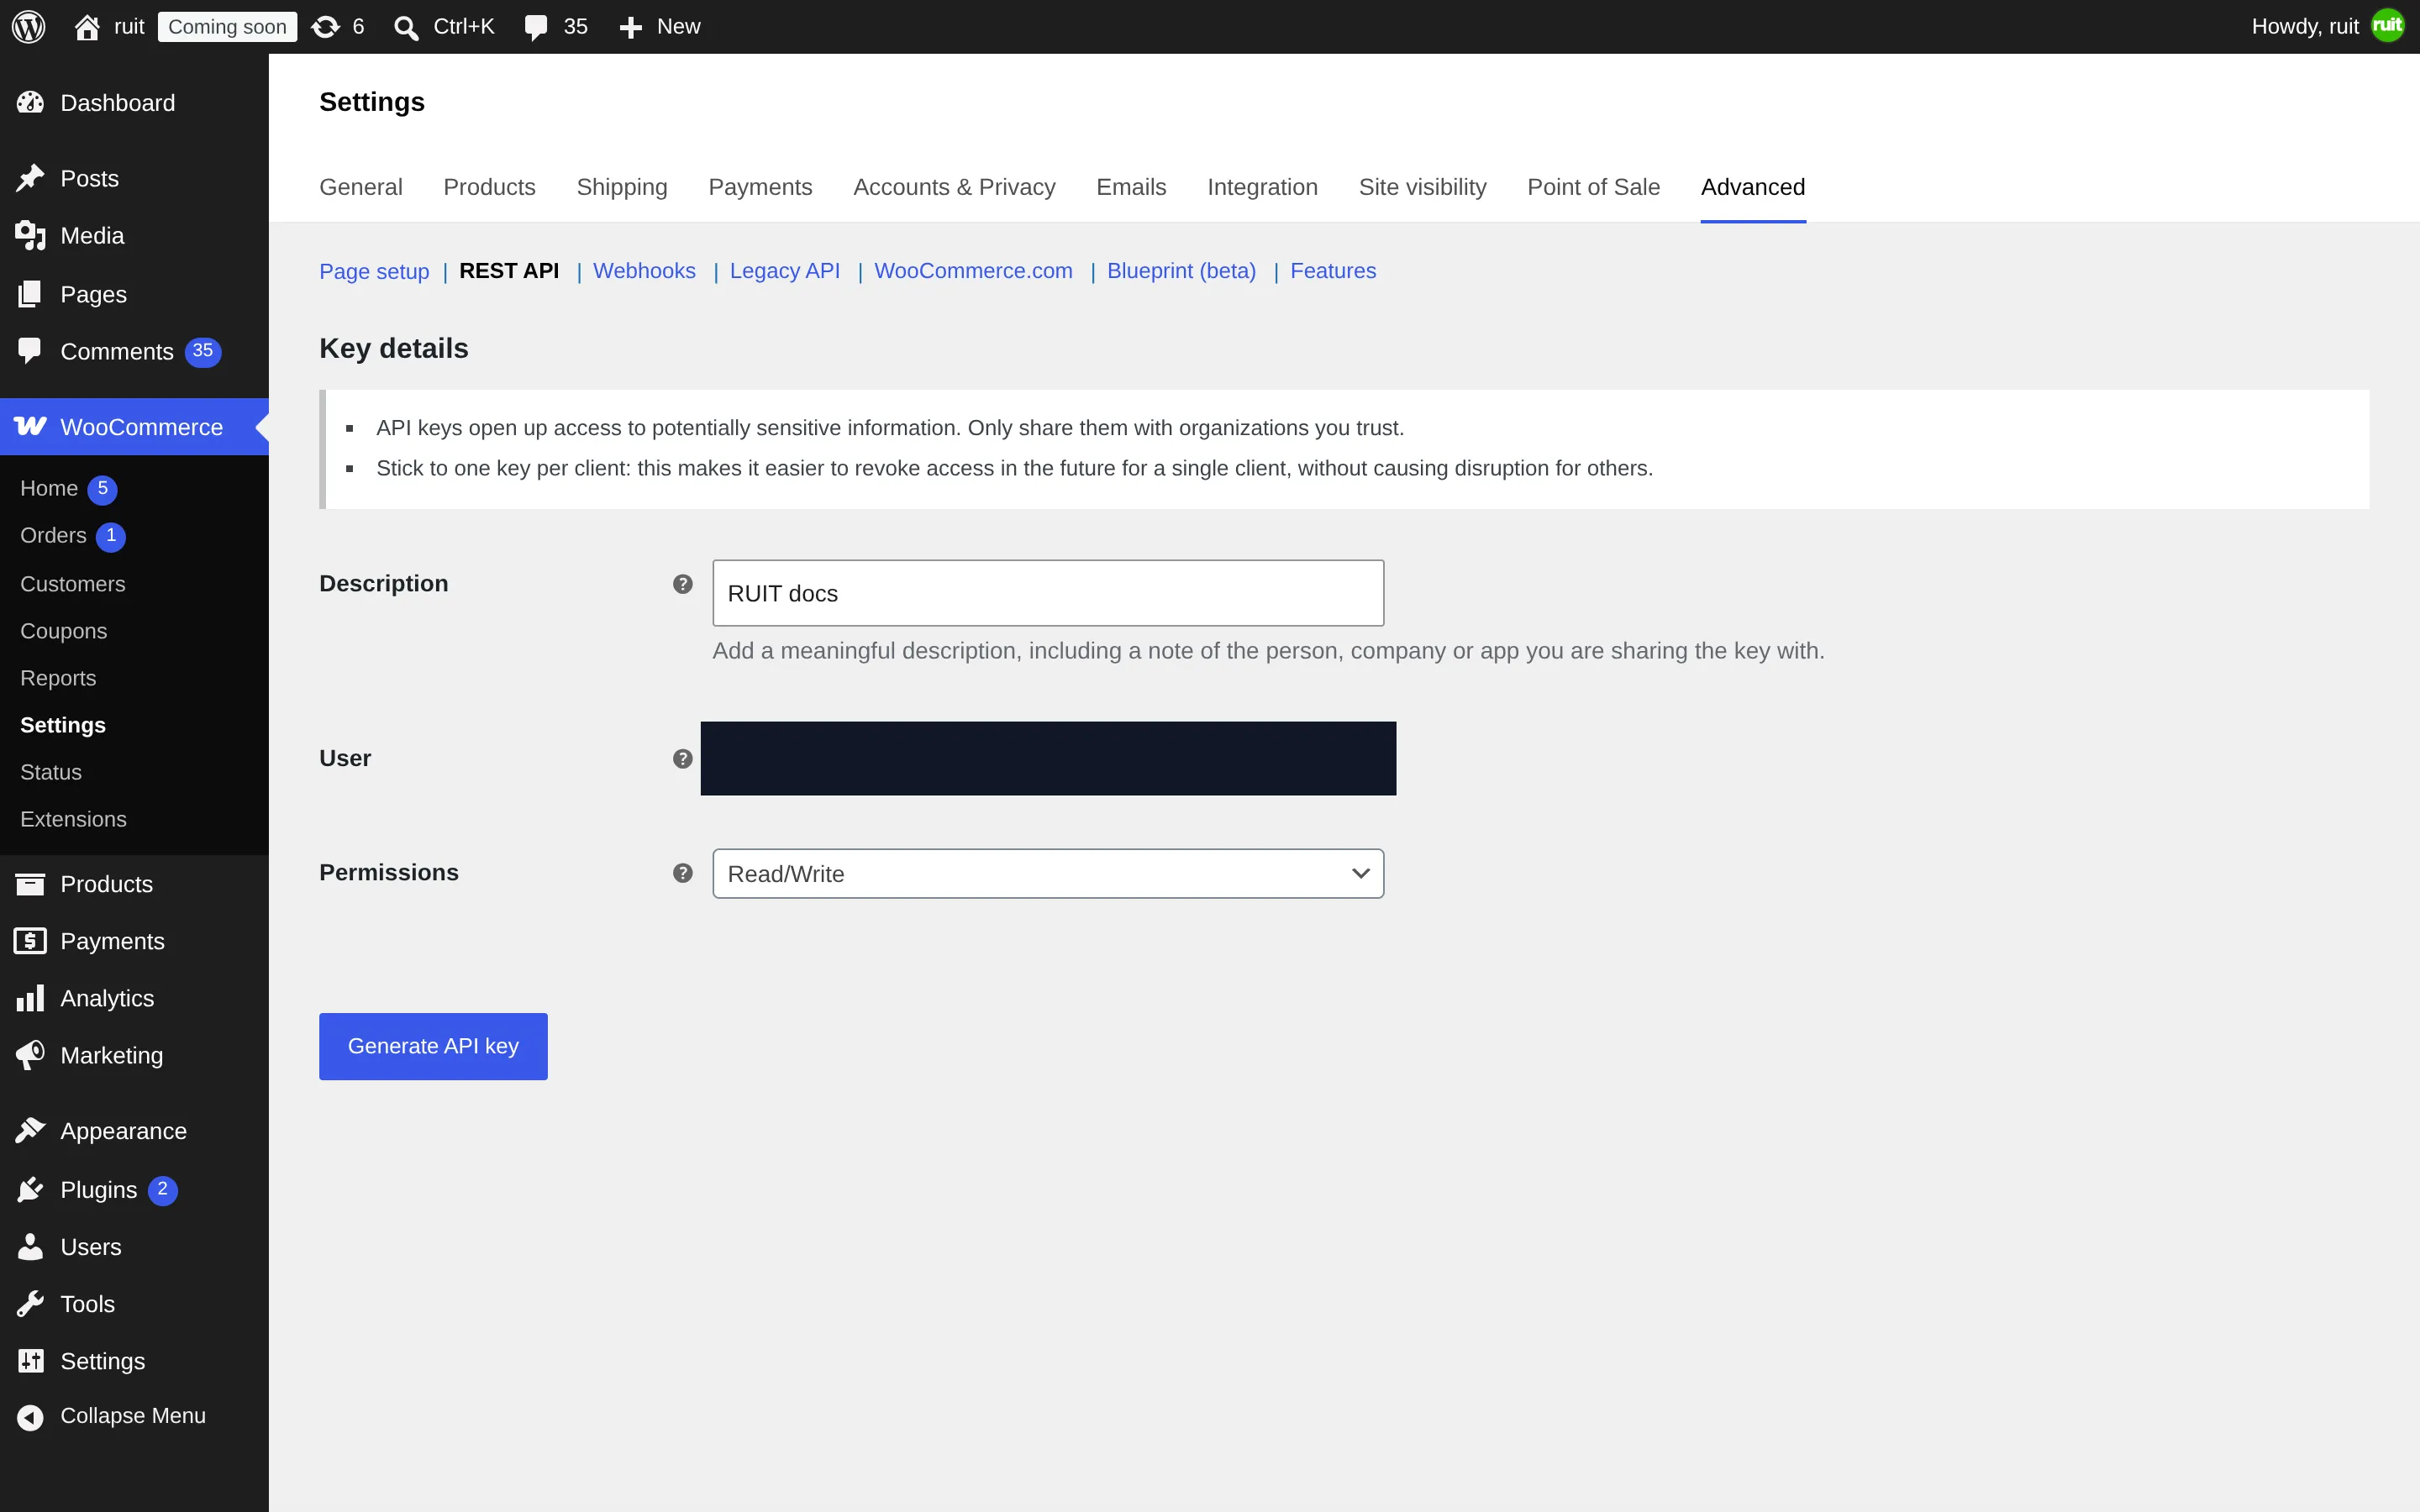
The three boxes: the description, the permissions set to read and write, and the generate button. The user is hidden because it shows the administrator’s email address.
WooCommerce shows you the two keys only once: the consumer key, which starts with ck_, and
the consumer secret, which starts with cs_. Copy them now; if you close the page, you will have
to generate another key.
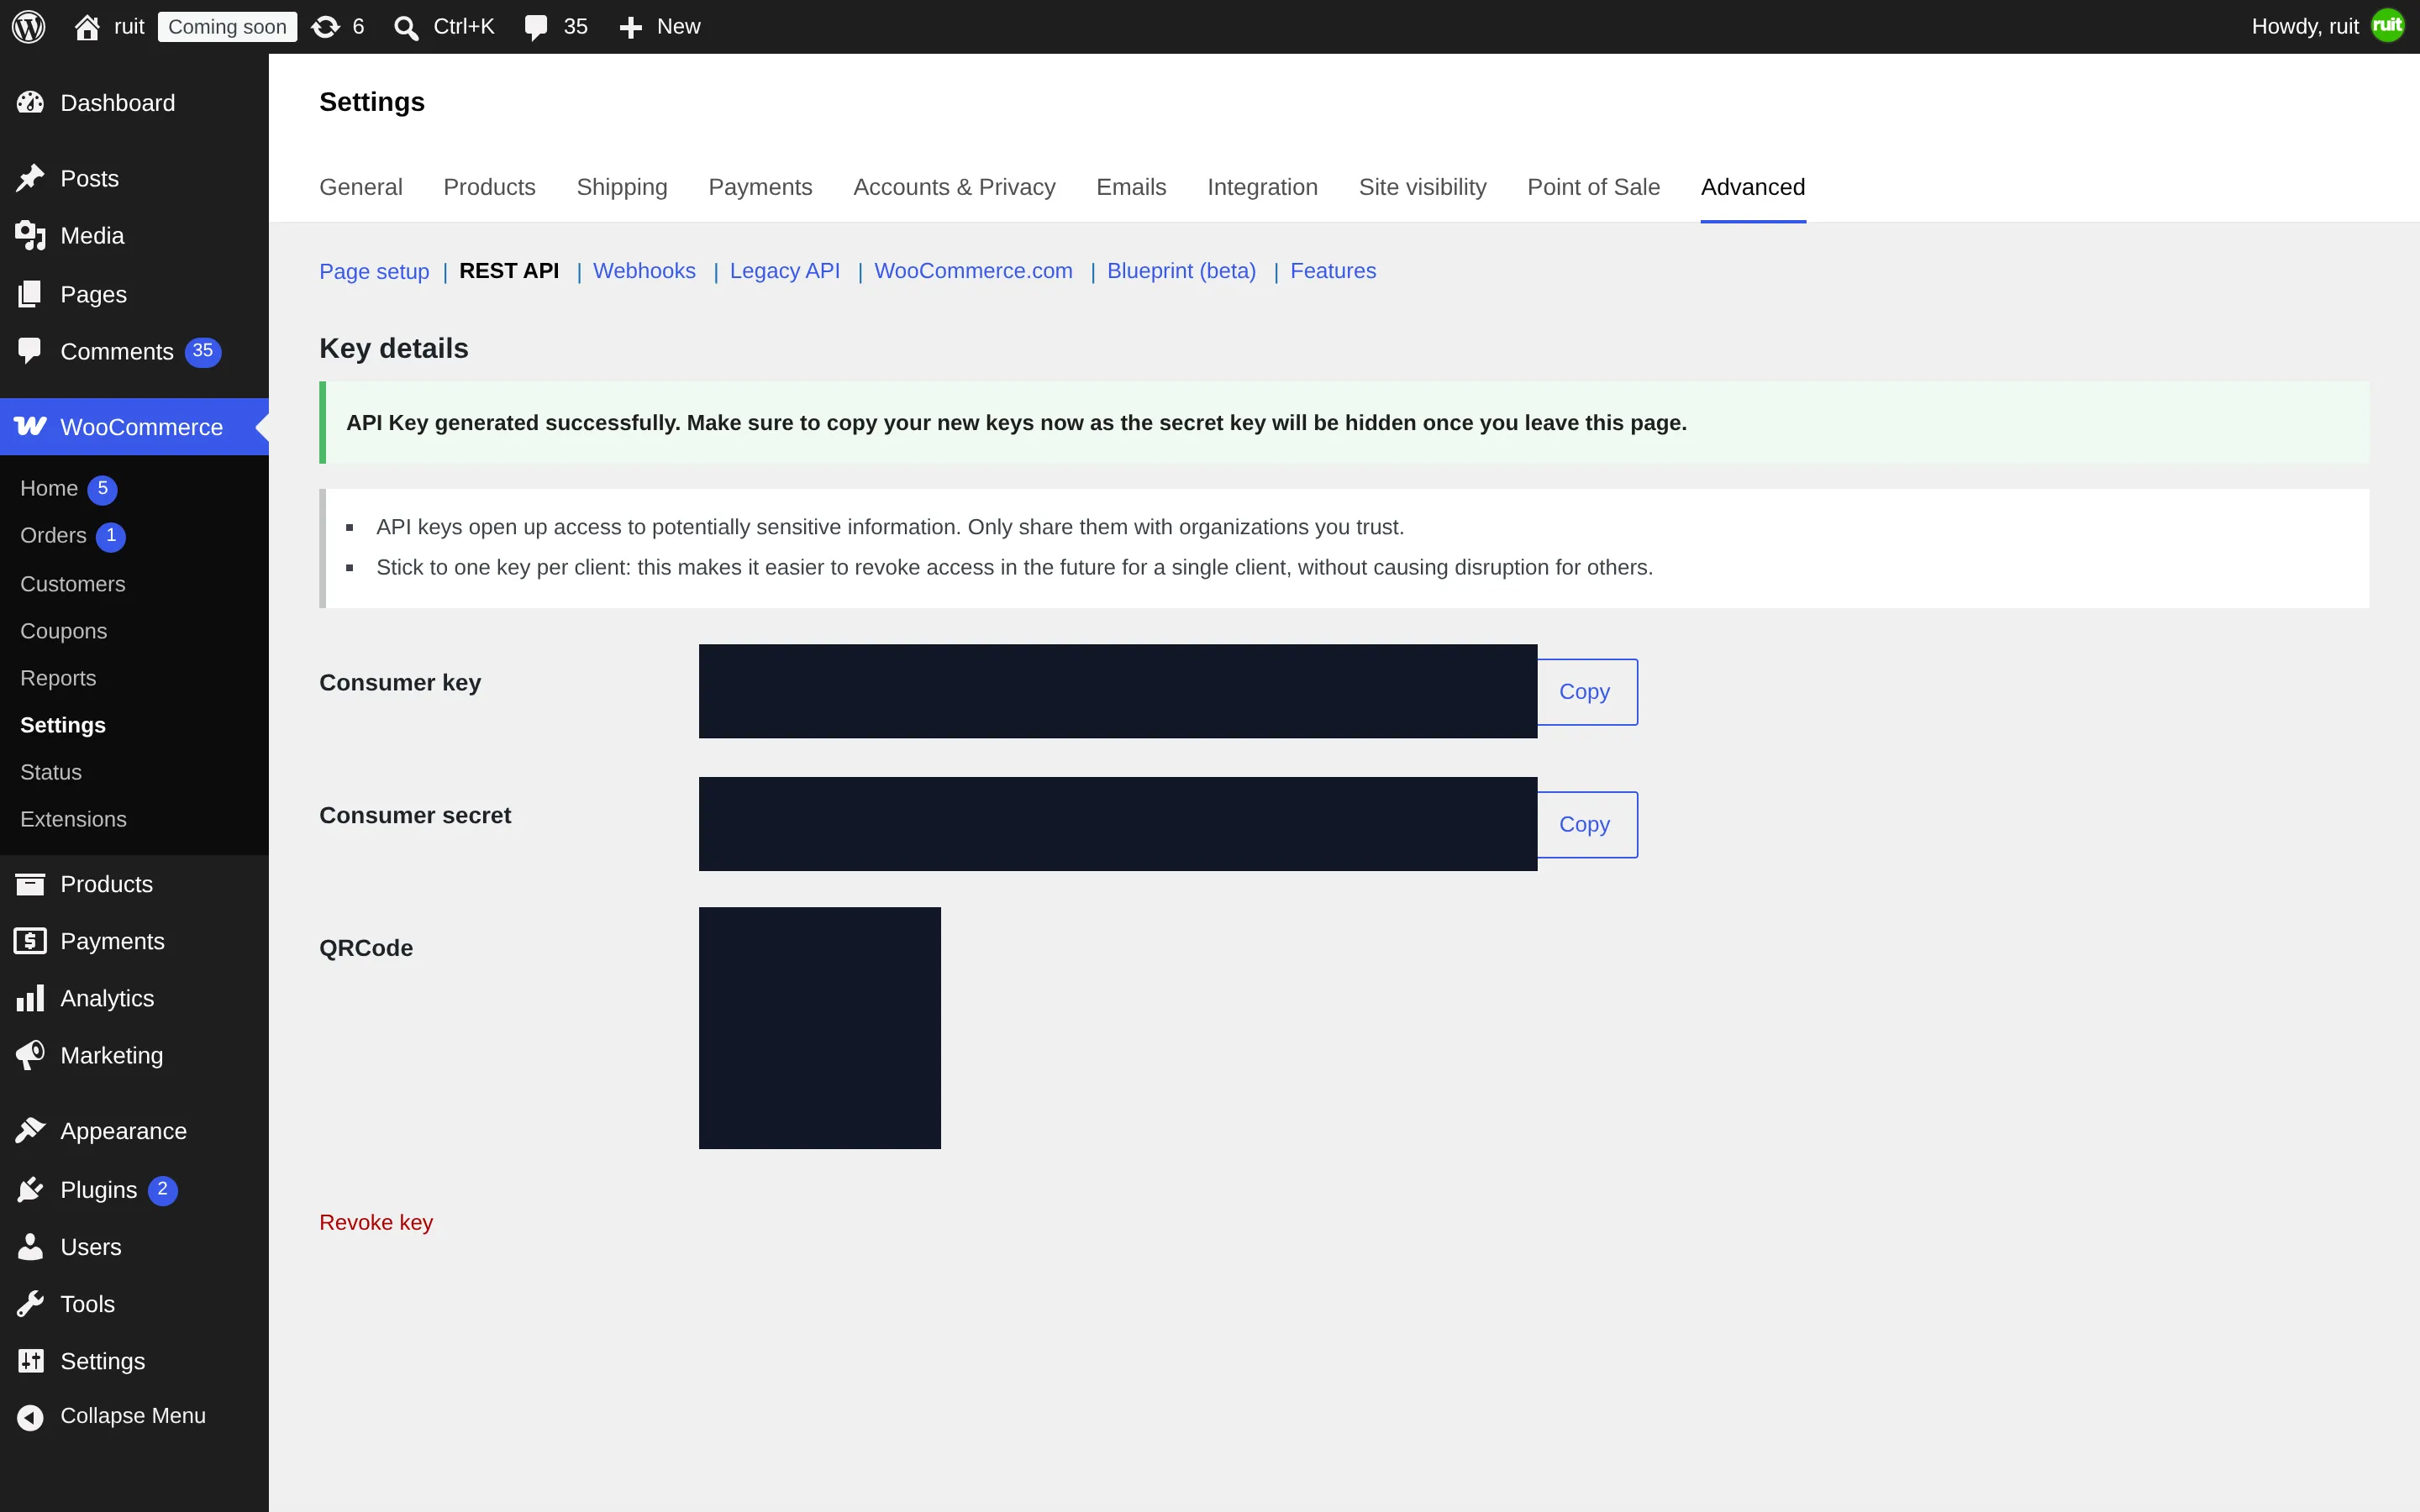
The two keys, hidden here. The boxes mark the two Copy buttons; the green notice warns that the secret will not be shown again.
Go back to RUIT, open Prefer to connect manually? and fill in Website, Consumer Key and Consumer Secret. Press Connect. RUIT checks that the keys have the right format and then tries them against your store.
What you have achieved
Your store appears under Connected Accounts with its WooCommerce card. The keys do not expire, so the card does not have the Reconnect button that Wallapop and Vinted do: the connection lasts until you delete the key in WooCommerce. What is more, your store has been set up to tell RUIT about every sale as it happens, without waiting for the next round of checks.
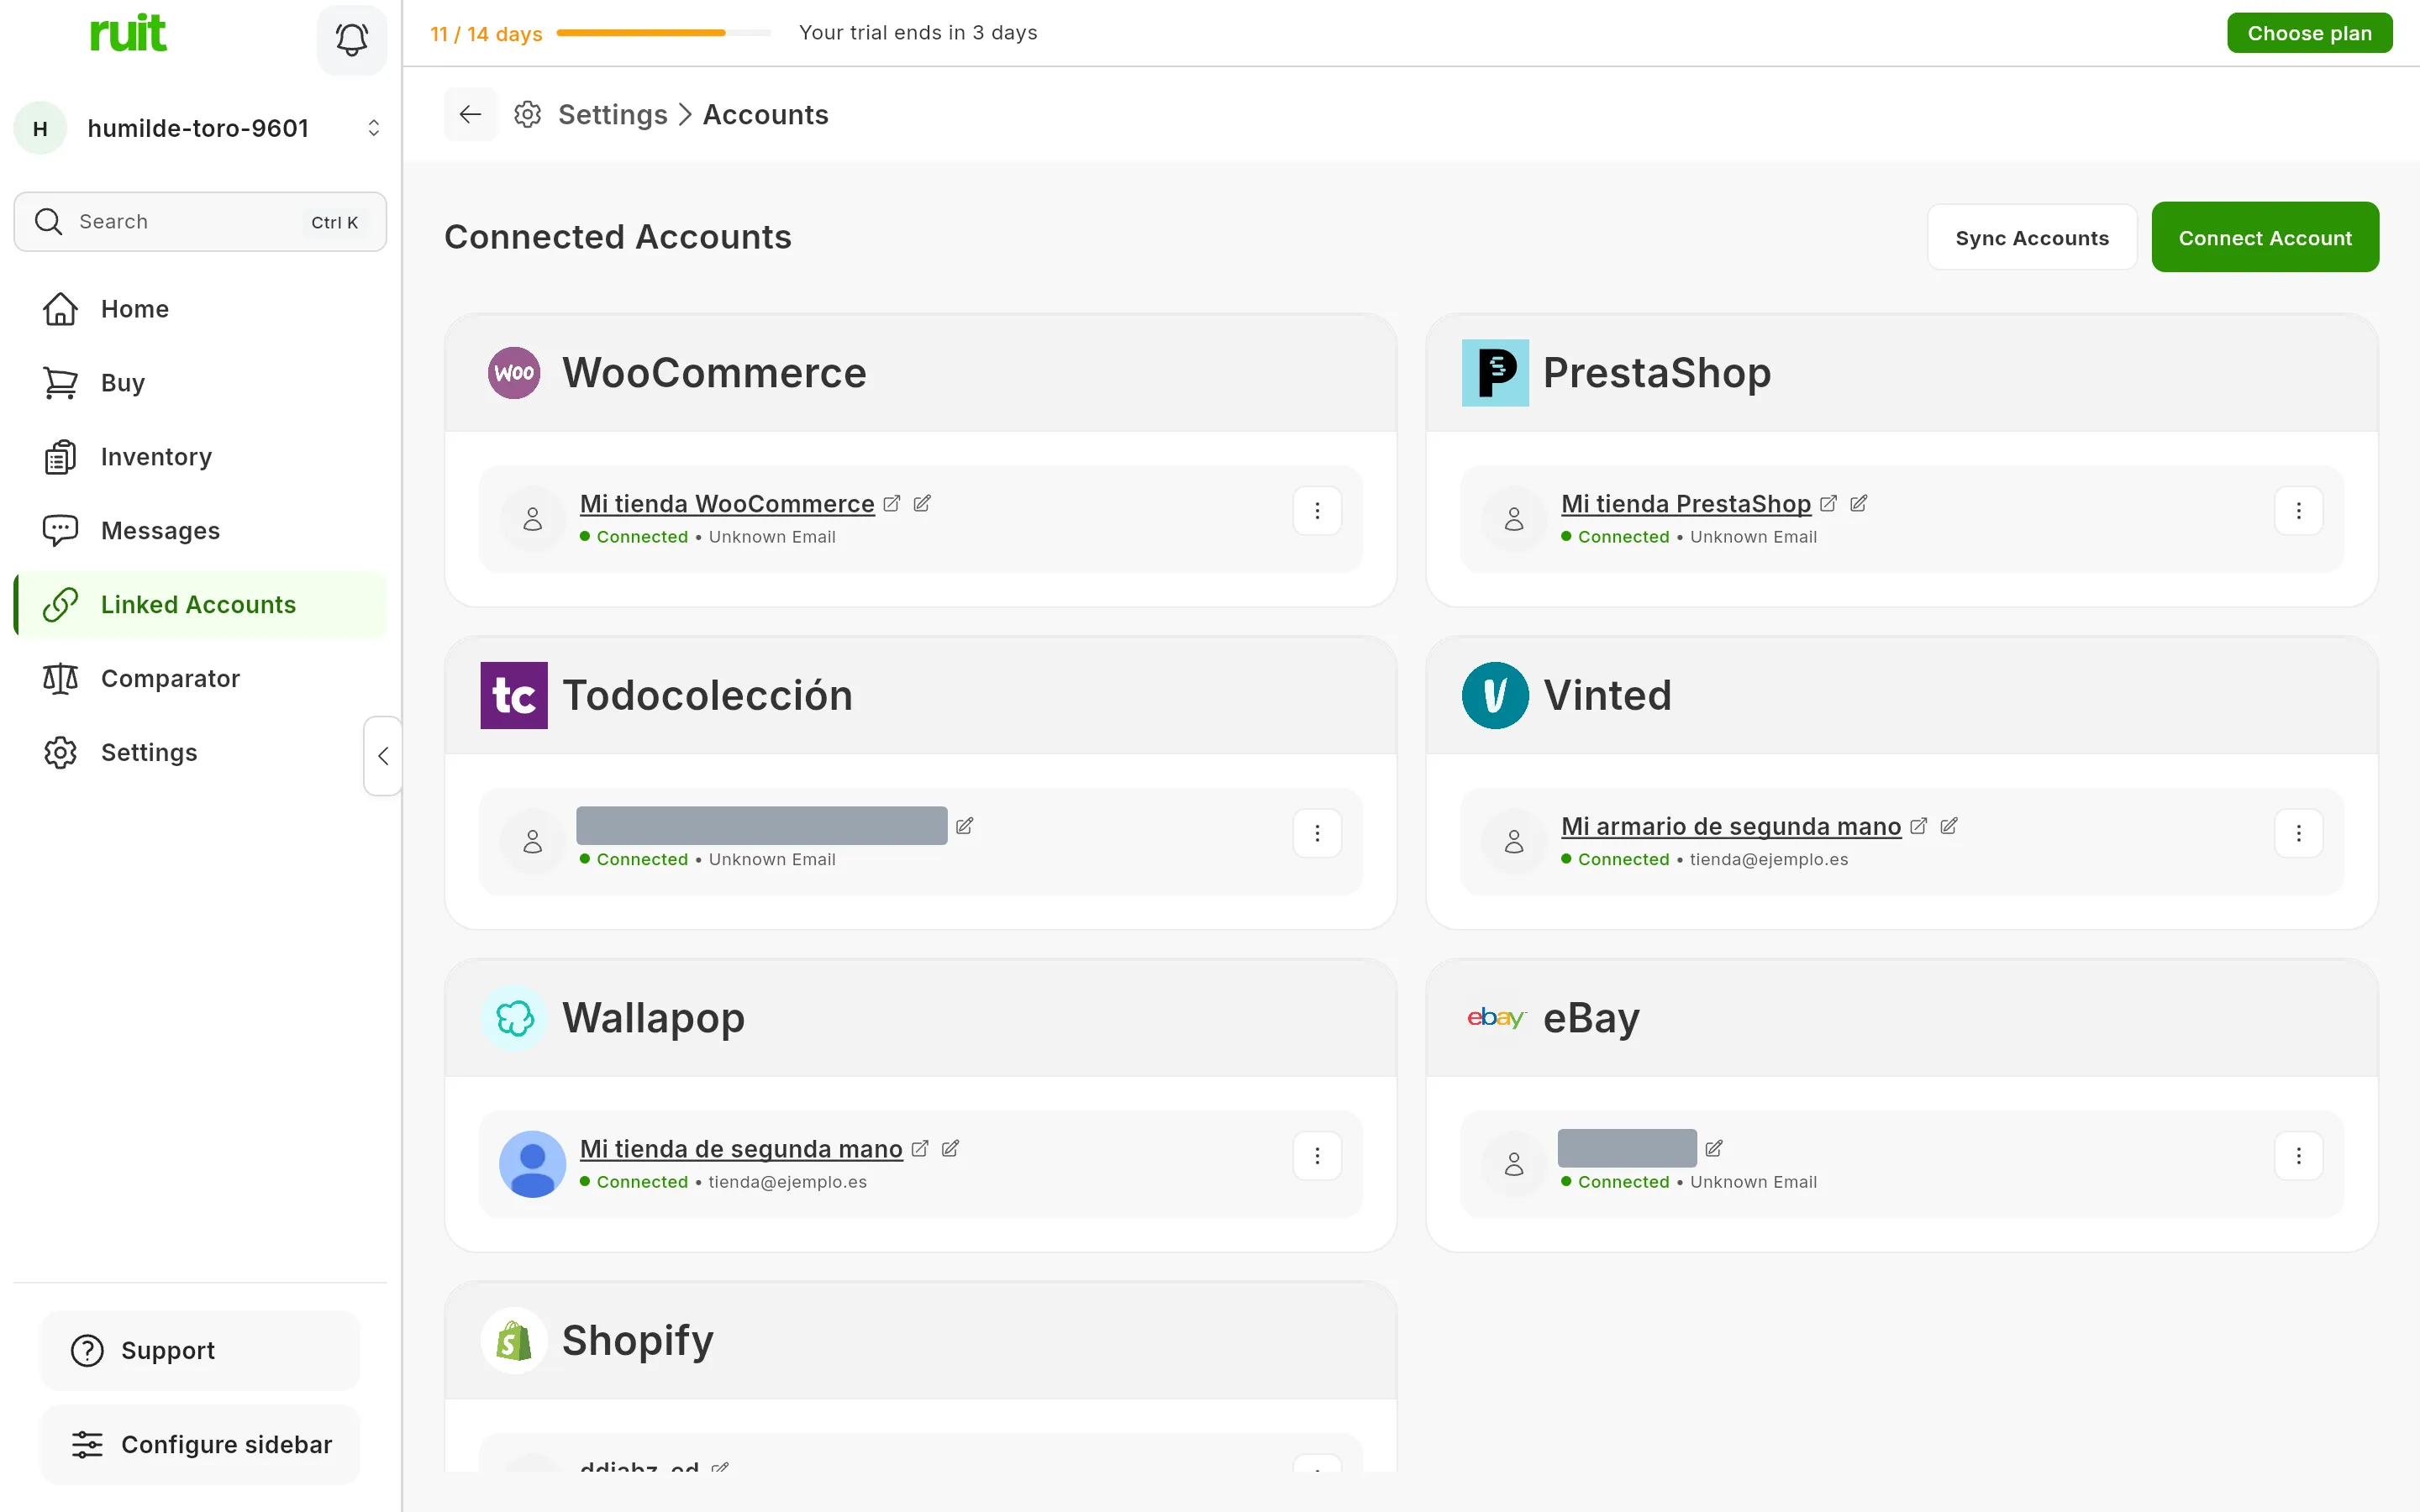
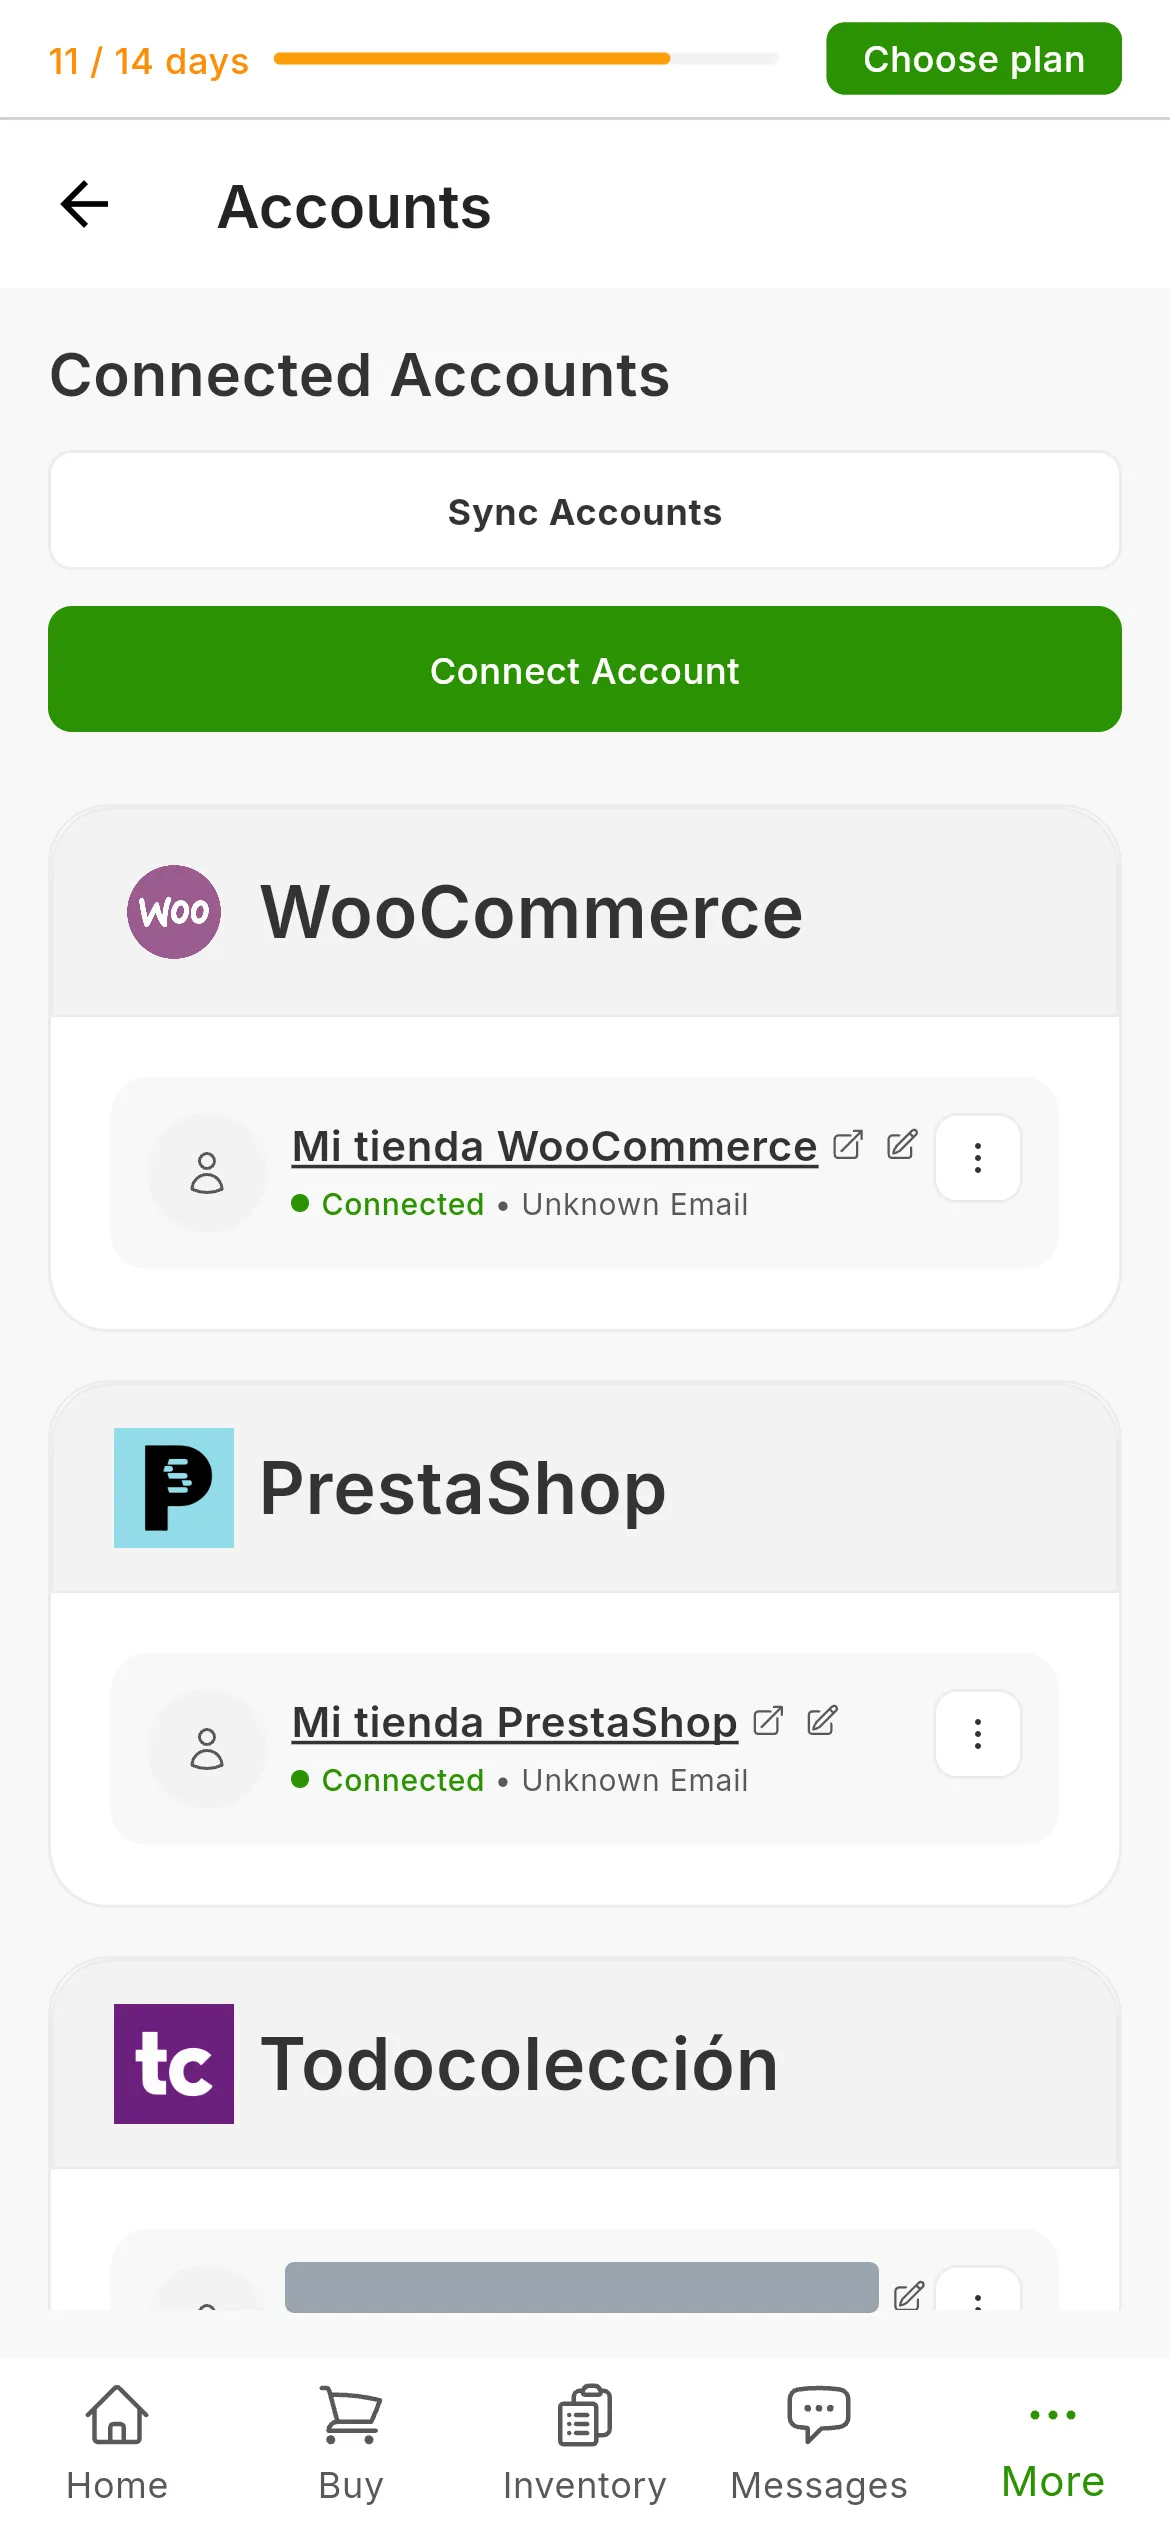
The WooCommerce store among the connected accounts. Its card carries whatever name you want to give it and no reconnect button.
Next step: importing from a marketplace to bring in the products you already have in the store, or publishing your first listing.
If something is off
- “Failed to verify credentials. Please check your API keys and store URL.” RUIT called your
store and did not get a valid answer. It gives the same message for every cause, so check them
in order: the address points to the root of the domain; the WooCommerce API answers at
https://yourstore.com/wp-json/wc/v3/(a security plugin, or WordPress permalinks set to Plain, switch it off); WooCommerce is 3.5 or later; and the keys are copied in full. - “Invalid credentials format.” The key does not start with
ck_or the secret does not start withcs_. Copy both again, with no spaces. - “The URL must use HTTPS (not HTTP).” RUIT does not connect stores without
https://. Put a certificate on the store and try again. - You come back to “WooCommerce connected” but the card does not appear under Accounts. Your store approved, but RUIT could not check the keys against it. Try the keys route, step 4, which tells you on the spot what is failing.
- “The connection was not authorised.” You pressed Deny on your store. Repeat from step 2 and accept the permissions it asks for.
- More than 15 minutes have passed with the authorization open. It has expired. Start again from step 1.
Video
Video not recorded yet: Connecting a WooCommerce store
Did this article help?
Thanks for telling us.